Introduction to Word2Vec

บทความโดย ผศ.ดร.ณัฐโชติ พรหมฤทธิ์
ภาควิชาคอมพิวเตอร์
คณะวิทยาศาสตร์
มหาวิทยาลัยศิลปากร
ในการใช้ NLP Application เพื่อแก้ปัญหา เช่น การทำ Intent Classificaion หรือ Sentiment Analysis เราอาจต้องมีการตัดคำ และแปลงคำเป็นตัวเลข เพื่อนำเข้า Neural Network Model เช่น ประโยค "Need help pleese" ซึ่งมีการแปลงเป็นตัวเลข ดังภาพด้านล่าง

อย่างไรก็ตามตัวเลขแต่ละตัวที่แทนคำแต่ละคำ ด้วยวิธีการดังกล่าว ยังขาด Information ที่แสดงถึงความสัมพันธ์กับคำอื่นๆ ในประโยค ซึ่งส่งผลต่อประสิทธิภาพในการทำนายของ Model
ในปี พ.ศ. 2556 Tomas Mikolov ซึ่งเป็นนักวิจัยของ Google ได้นำเสนอวิธีการสร้าง Word Embedding (Vector Representations of Words) ที่ชื่อ Word2Vec ซึ่งจะเรียนรู้การสร้าง Vector จากคำบริบทในประโยค ซึ่งหลักๆ แล้วในการสร้าง Word Embedding ของ Word2Vec จะมีอยู่ 2 วิธี ได้แก่ Skip Gram และ CBOW (Common Bag Of Words)
ใน Workshop นี้ เราจะได้พัฒนา Word2Vec Model แบบ Skip Gram โดยใช้เทคนิคทาง Neural Network แบบ Encoder-Decoder Model ที่มี Layer จำนวน 2 Layer (ไม่นับ Input Layer)
โดยจะยกตัวอย่างการสร้าง Word Embedding ซึ่งจะเรียนรู้การสร้าง Vector จากคำบริบทในกลอนสุภาพ จำนวน 2 บท ดังนี้
ท้องฟ้าที่ว่ากว้างยังวัดได้
ทะเลใหญ่ว่าลึกยังหยั่งถึง
กระแสลมแปรปรวนชวนตะลึง
มันน่าทึ่งที่ยังรู้ทิศทาง
แต่สิ่งหนึ่งซึ่งเราไม่อาจรู้
ถึงวัดดูวัดไม่ได้ใครทราบบ้าง
เพราะสิ่งนั้นซ่อนเร้นและอำพราง
ยกตัวอย่างจิตมนุษย์สุดคะเน

-สัจจาภรณ์ ไวจรรยา-
จากกลอนสุภาพด้านบน ประกอบด้วยประโยค หรือวรรค ทั้งหมด 8 วรรค เราจะต้องสร้าง Dataset ที่เป็น Input Data และผลเฉลย จากคำ และคำบริบทในแต่ละวรรค โดยมีวิธีการดังนี้
- ตัดคำในแต่ละวรรค
ท้อง ฟ้า ที่ ว่า กว้าง ยัง วัด ได้- กำหนดความยาวของบริบทของคำ เช่น เป็น 2-Gram คือ จะพิจารณาคำที่อยู่รอบๆ มันทั้งด้านหน้า และด้านหลัง 2 คำ

- พิจารณาทุกคำในวรรค ตั้งแต่คำแรกถึงคำสุดท้าย เพื่อหาคำบริบท โดยจะแสดงตัวอย่างของ Dataset จาก 1 วรรค ดังภาพด้านล่าง
[['ท้อง', 'ฟ้า'],
 ['ท้อง', 'ที่'],
 ['ฟ้า', 'ท้อง'],
 ['ฟ้า', 'ที่'],
 ['ฟ้า', 'ว่า'],
 ['ที่', 'ท้อง'],
 ['ที่', 'ฟ้า'],
 ['ที่', 'ว่า'],
 ['ที่', 'กว้าง'],
 ['ว่า', 'ฟ้า'],
 ['ว่า', 'ที่'],
 ['ว่า', 'กว้าง'],
 ['ว่า', 'ยัง'],
 ['กว้าง', 'ที่'],
 ['กว้าง', 'ว่า'],
 ['กว้าง', 'ยัง'],
 ['กว้าง', 'วัด'],
 ['ยัง', 'ว่า'],
 ['ยัง', 'กว้าง'],
 ['ยัง', 'วัด'],
 ['ยัง', 'ได้'],
 ['วัด', 'กว้าง'],
 ['วัด', 'ยัง'],
 ['วัด', 'ได้'],
 ['ได้', 'ยัง'],
['ได้', 'วัด']]- นำ Dataset ไป Train ด้วย Neural Network Model แบบ Encoder-Decoder
ที่มี 2 Layer (ไม่นับ Input Layer) ได้แก่ Hidden Layer สำหรับการทำ Encoder และ Output Layer สำหรับการทำ Decoder โดยกำหนดจำนวน Input Node และ Output Node เท่ากับจำนวน Bag of Words ดังภาพด้านล่าง
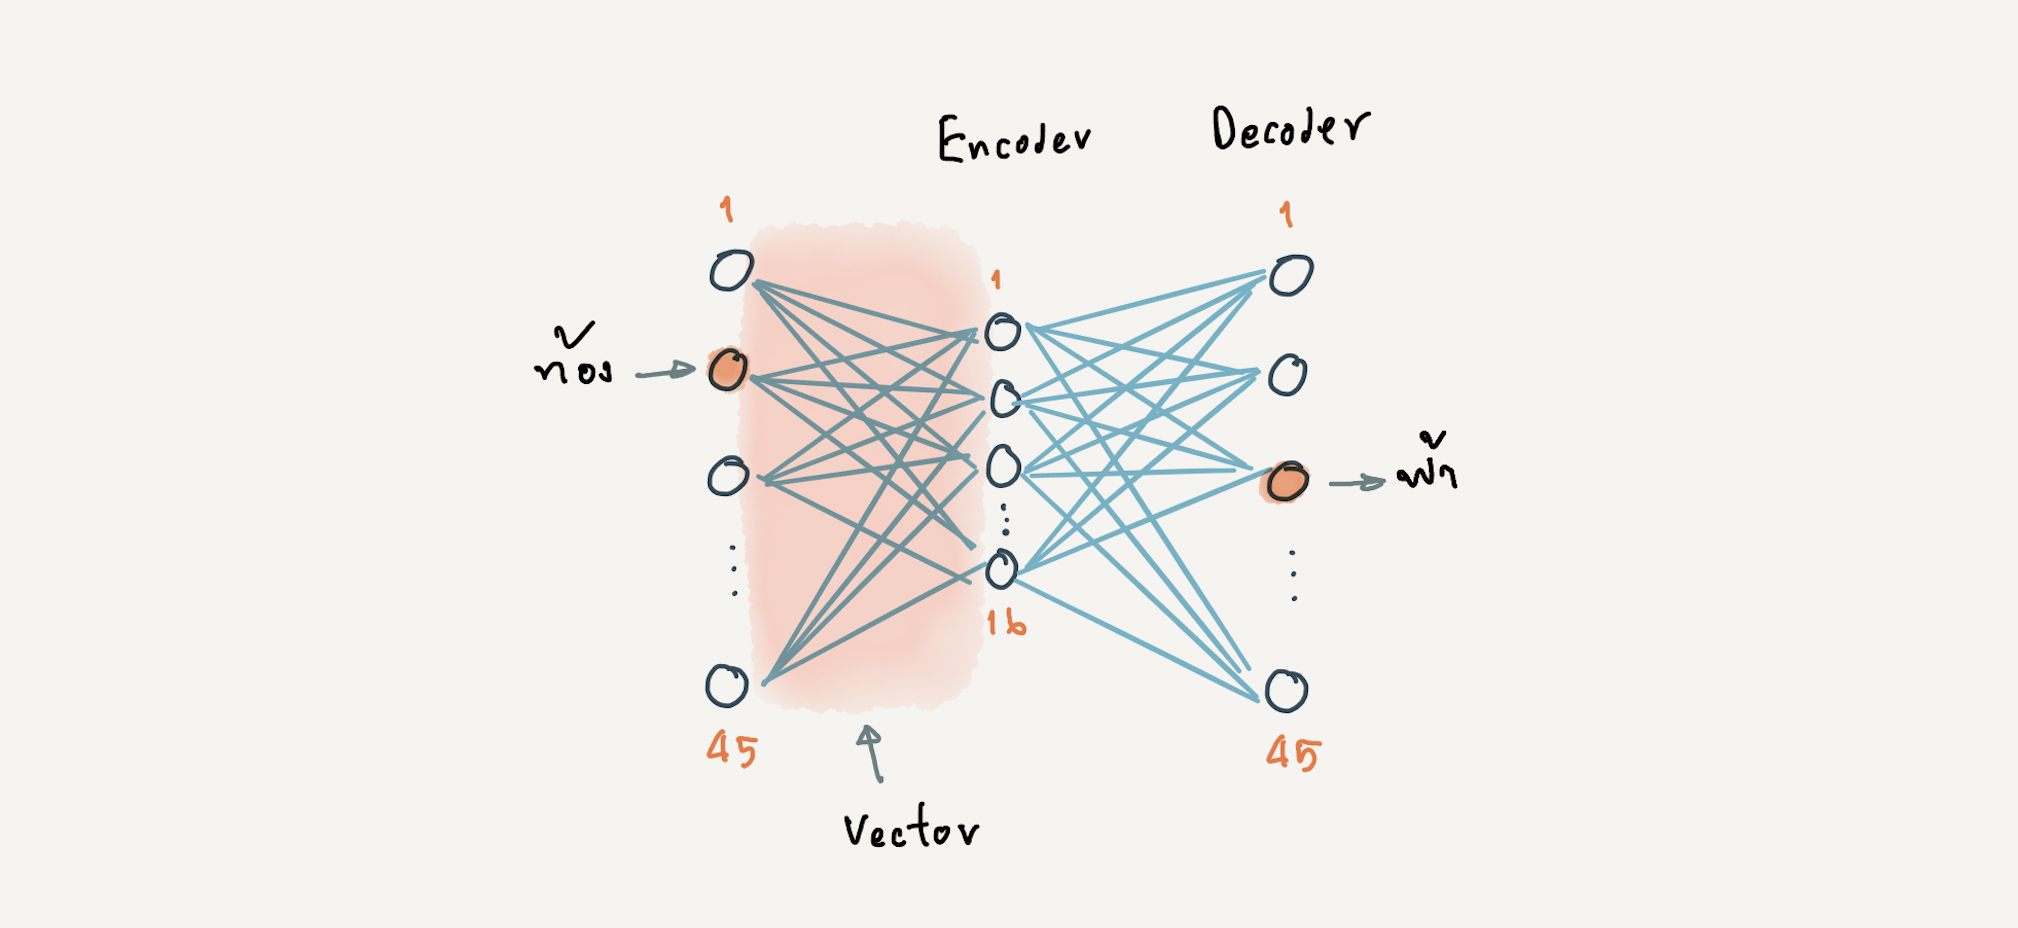
- เมื่อ Train เสร็จแล้ว นำค่า Weight และ Bias (Vector) จาก Hidden Layer (Encoder) ไปใช้งาน
ซึ่งเราสามารถใช้ Matrix ในการ Implement Neural Network ได้ดังภาพด้านล่าง
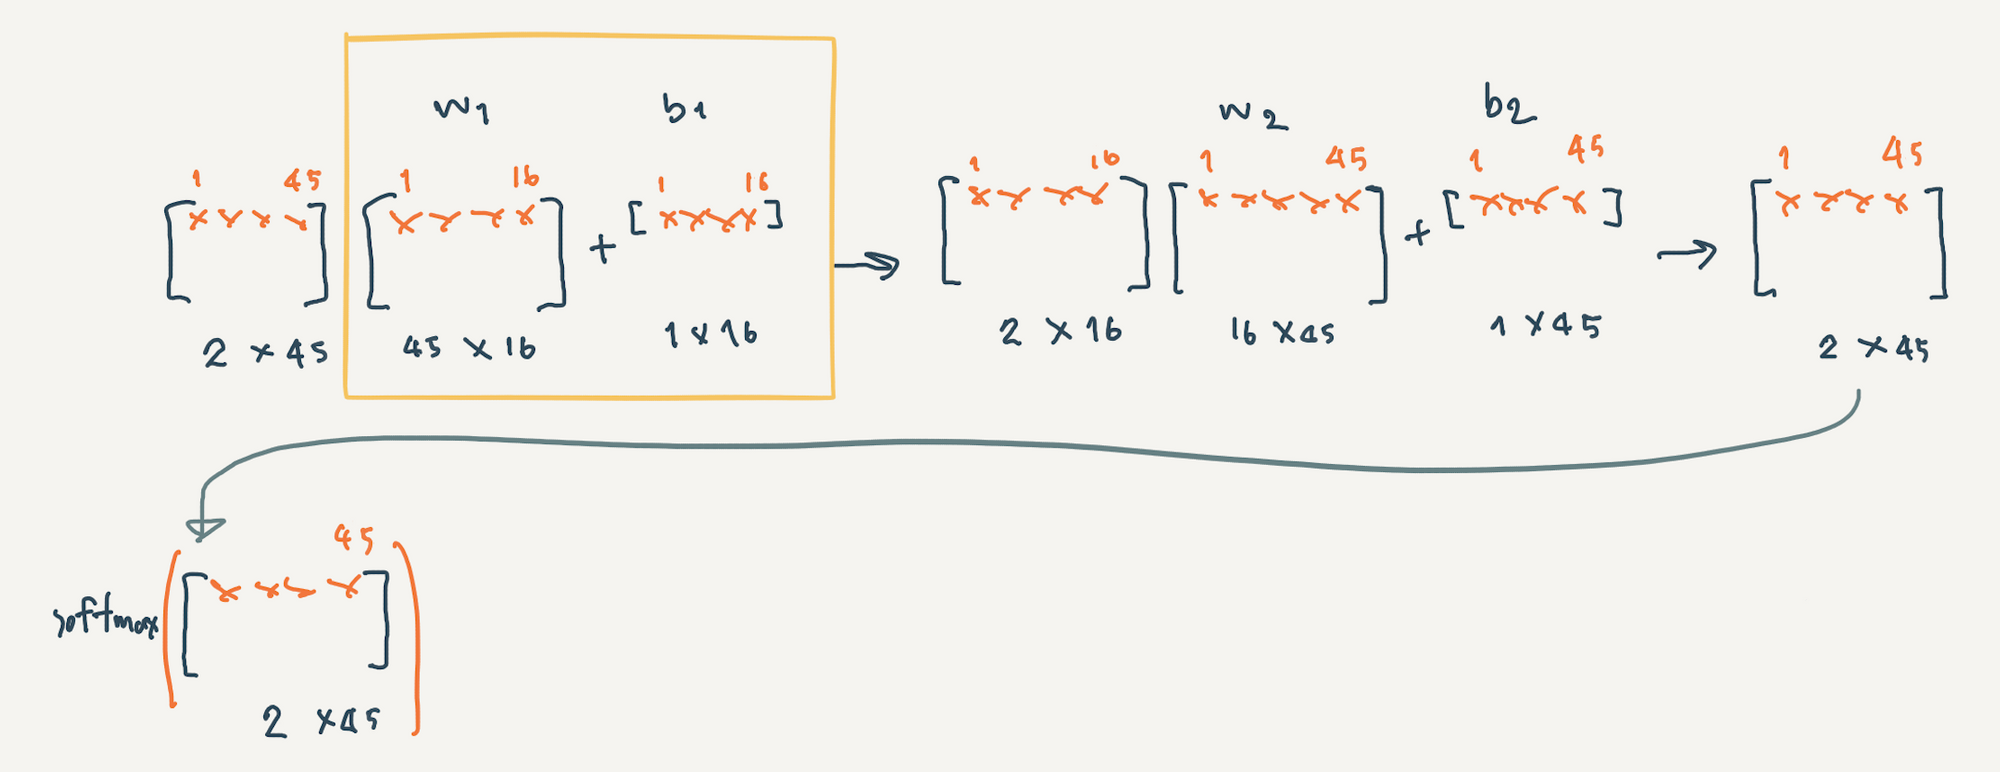
จากภาพเราเตรียม Input Data แบบ One Hot ขนาด 45 คำ (จำนวน Back of Words) ที่มี Batch Size เท่ากับ 2 โดยมี w1 และ b1 เป็น Weight และ Bias ของ Hidden Layer และ w2 และ b2 เป็น Weight และ Bias ของ Output Layer โดยใน Output Layer จะมีการแปลงค่าใน Matrix ด้วย Softmax Activate Function
จากแนวคิดเบื้องต้นของวิธีการแบบ Word2Vec เราจะพัฒนา Skip Gram Model โดยใช้ Keras API ตามขั้นตอนดังต่อไปนี้
ก่อนอื่นเราจะติดตั้งตัวตัดคำ เนื่องจากในบทความนี้เราจะสร้าง Word2Vec จากข้อความที่เป็นภาษาไทย โดยเราจะเลือกใช้ตัวตัดคำจาก PythaiNLP และทดลองเทียบตัวตัดคำ 2 ตัว คือ 1. ตัวที่เป็น Default โดยใช้ฟังก์ชัน word_tokenize ซึ่งตัวตัดคำนี้มีชื่อจริง ๆ ว่า newmm ที่ตัดคำแบบ Dictionary-based ใช้อัลกอริธึม maximal matching และ 2. ตัวตัดคำชื่อ Deepcut ซึ่งใช้ Deep Learning
- ติดตั้ง PythaiNLP
!pip install pythainlp- สร้าง Text file ที่เก็บกลอนสุภาพ 8 วรรค
text = '''ท้องฟ้าที่ว่ากว้างยังวัดได้
ทะเลใหญ่ว่าลึกยังหยั่งถึง
กระแสลมแปรปรวนชวนตะลึง
มันน่าทึ่งที่ยังรู้ทิศทาง
แต่สิ่งหนึ่งซึ่งเราไม่อาจรู้
ถึงวัดดูวัดไม่ได้ใครทราบบ้าง
เพราะสิ่งนั้นซ่อนเร้นและอำพราง
ยกตัวอย่างจิตมนุษย์สุดคะเน'''
with open('poem.txt', 'w') as f:
f.writelines(text)- อ่าน Text file (poem.txt) ที่ใช้ทดสอบตัวตัดคำ
with open("poem.txt", "r") as file:
    corpus = file.read().splitlines()

print(corpus)
- ทดลองตัดคำด้วย word_tokenize
from pythainlp.tokenize import word_tokenize
words = []
for sentences in corpus:
    tokens = word_tokenize(sentences.strip())
    for word in tokens:
        words.append(word)

print(words)
['ท้องฟ้า', 'ที่ว่า', 'กว้าง', 'ยัง', 'วัด', 'ได้', 'ทะเล', 'ใหญ่', 'ว่า', 'ลึก', 'ยัง', 'หยั่งถึง', 'กระแสลม', 'แปรปรวน', 'ชวน', 'ตะลึง', 'มัน', 'น่าทึ่ง', 'ที่', 'ยัง', 'รู้', 'ทิศทาง', 'แต่', 'สิ่ง', 'หนึ่ง', 'ซึ่ง', 'เรา', 'ไม่', 'อาจ', 'รู้', 'ถึง', 'วัด', 'ดู', 'วัด', 'ไม่', 'ได้', 'ใคร', 'ทราบ', 'บ้าง', 'เพราะ', 'สิ่ง', 'นั้น', 'ซ่อนเร้น', 'และ', 'อำพราง', 'ยกตัวอย่าง', 'จิต', 'มนุษย์', 'สุด', 'คะเน']
- ติดตั้ง Deepcut
!pip install deepcut- ทดลองตัดคำด้วย deepcut
import deepcut
words = []
for sentences in corpus:
    tokens = deepcut.tokenize(sentences.strip())
    for word in tokens:
        words.append(word)

print(words)
['ท้อง', 'ฟ้า', 'ที่', 'ว่า', 'กว้าง', 'ยัง', 'วัด', 'ได้', 'ทะเล', 'ใหญ่', 'ว่า', 'ลึก', 'ยัง', 'หยั่ง', 'ถึง', 'กระแส', 'ลม', 'แปร', 'ปรวน', 'ชวน', 'ตะลึง', 'มัน', 'น่า', 'ทึ่ง', 'ที่', 'ยัง', 'รู้', 'ทิศทาง', 'แต่', 'สิ่ง', 'หนึ่ง', 'ซึ่ง', 'เรา', 'ไม่', 'อาจ', 'รู้', 'ถึง', 'วัดดู', 'วัด', 'ไม่', 'ได้', 'ใคร', 'ทราบ', 'บ้าง', 'เพราะ', 'สิ่ง', 'นั้น', 'ซ่อนเร้น', 'และ', 'อำพราง', 'ยก', 'ตัวอย่าง', 'จิตมนุษย์', 'สุด', 'คะเน']
จะเห็นว่าผลจากตัวตัดคำทั้ง 2 ตัวมีความแต่ต่างกันในผลลัพธ์ของบางคำ ดังนั้นขึ้นอยู่กับเราว่าจะพิจารณาใช้ตัวไหนครับ ซึ่งในบทความนี้จะขอเลือกใช้ Deepcut
- Import Package ที่จำเป็น
import numpy as np
import deepcut

import tensorflow

from tensorflow.keras.models import Sequential
from tensorflow.keras.layers import Dense, Dropout
from tensorflow.keras.models import load_model

from tensorflow.keras.callbacks import ModelCheckpoint
from tensorflow.keras.utils import plot_model

import matplotlib.pyplot as plt
from IPython.display import clear_output

import plotly
import plotly.graph_objs as go

import pickle as p
from nltk.cluster.util import cosine_distance- กำหนด EPOCH เท่ากับ 1000
EPOCH = 1000- สร้าง Dataset ทั้ง Input Data และผลเฉลยจากกลอนสุภาพ 2 บท โดยตัดคำด้วย Deepcut
words = []
for sentences in corpus:
    tokens = deepcut.tokenize(sentences.strip())
    for word in tokens:
        words.append(word)

print(words)
words = set(words)
words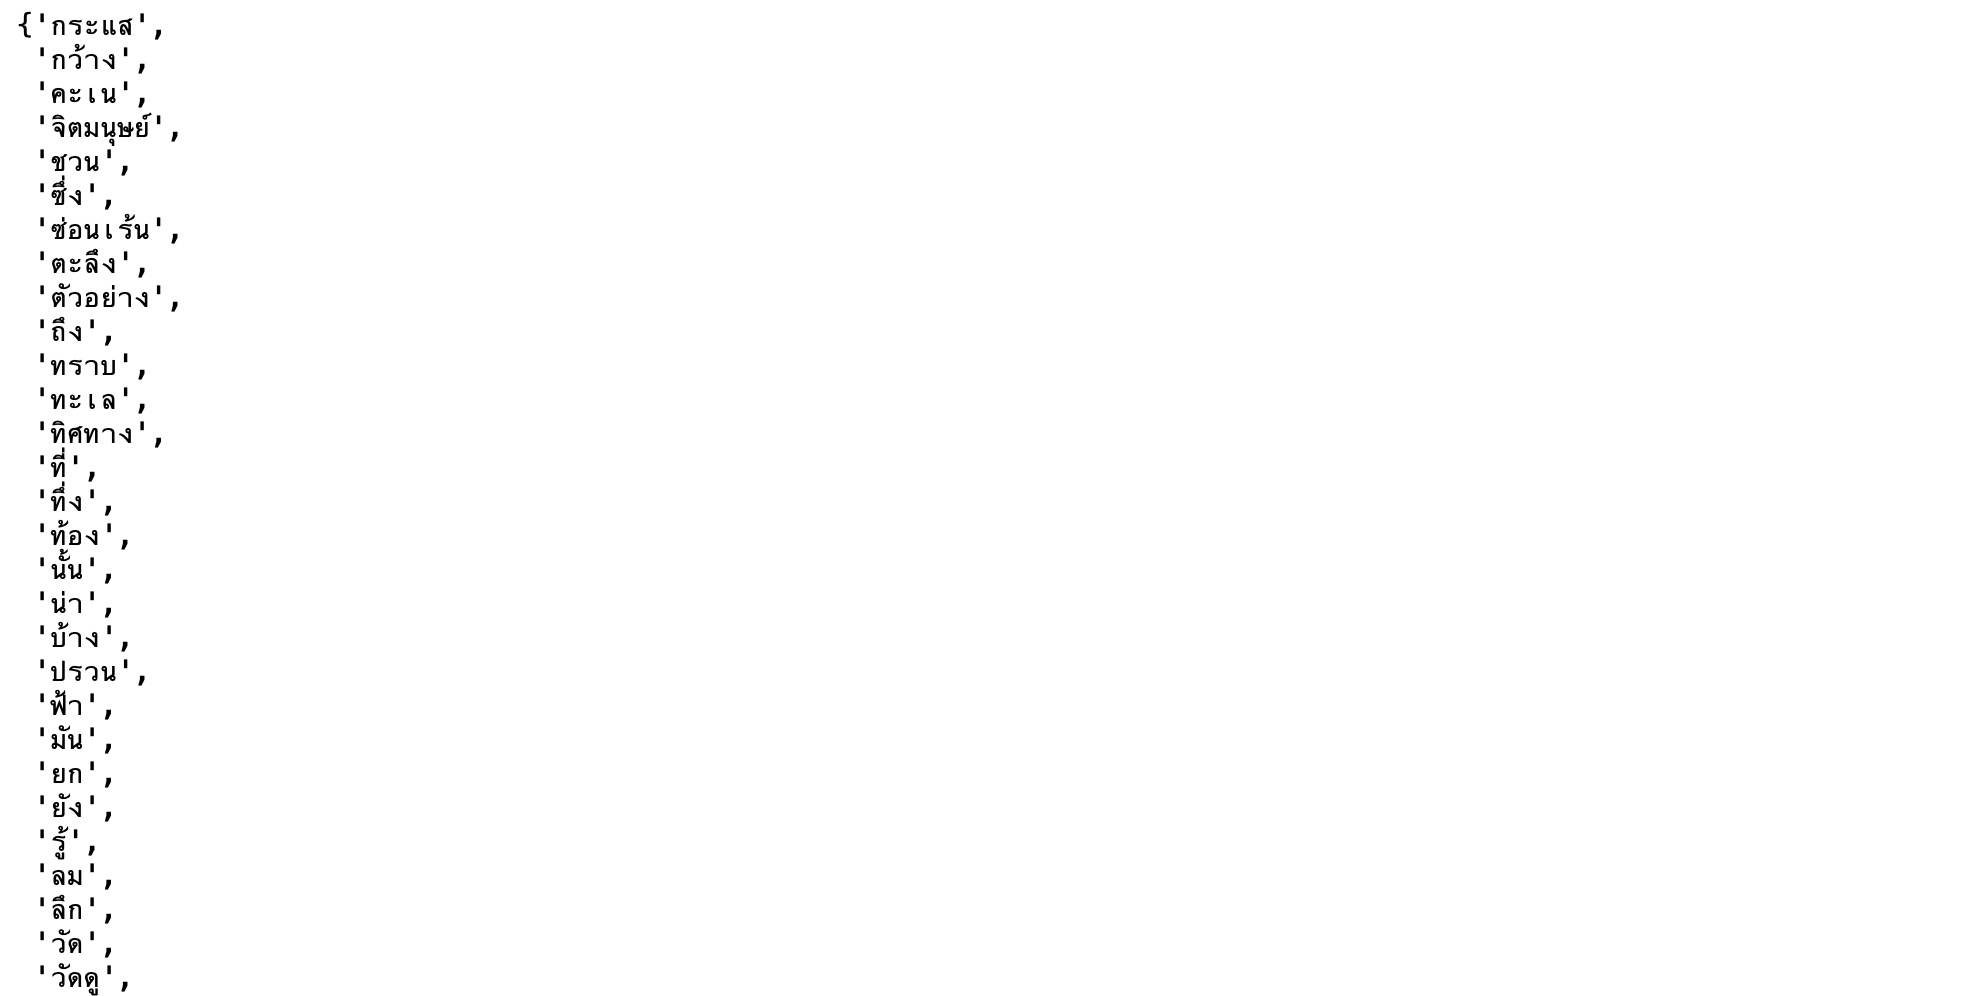
vocab_size = len(words)

word2int = {}
int2word = {}

for i, word in enumerate(words):
    word2int[word] = i
    int2word[i] = word

word2int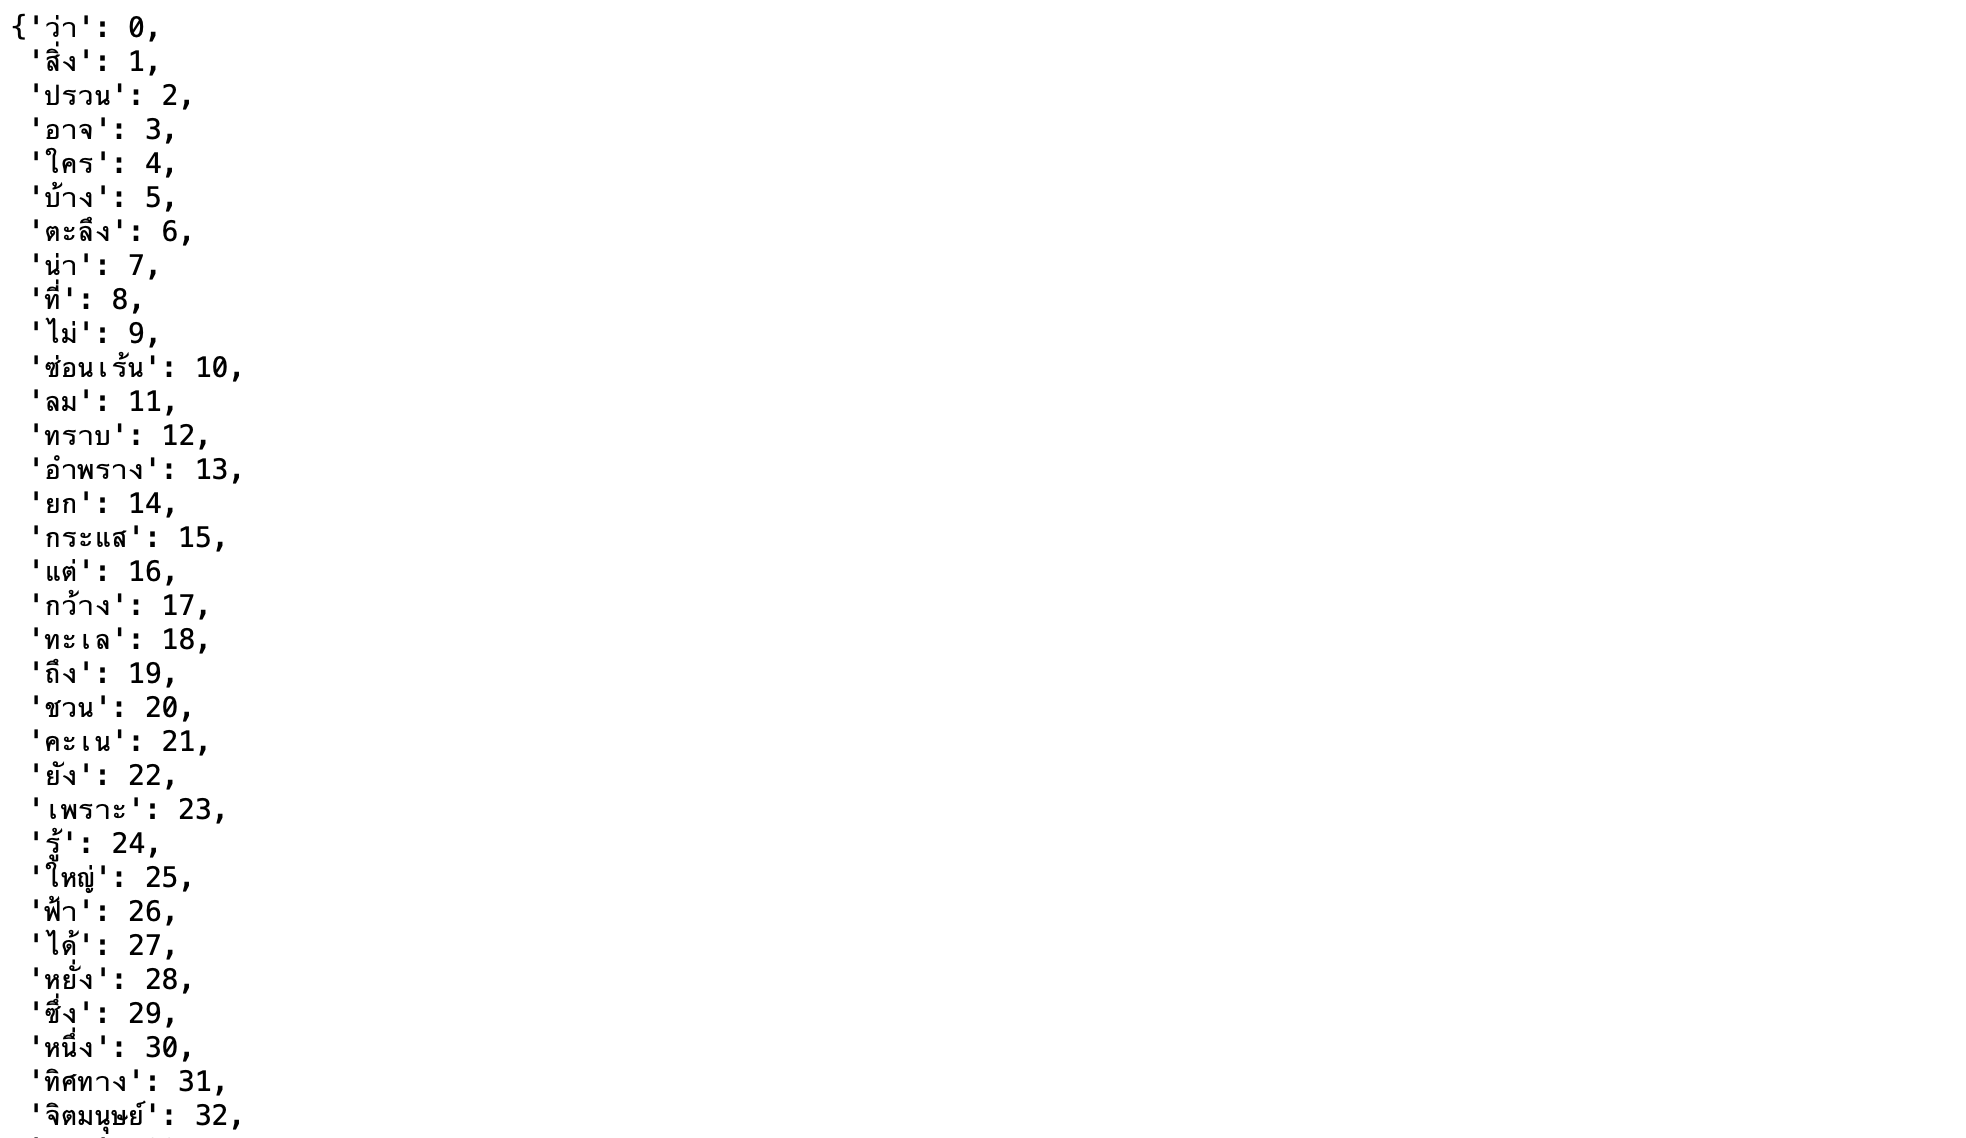
int2word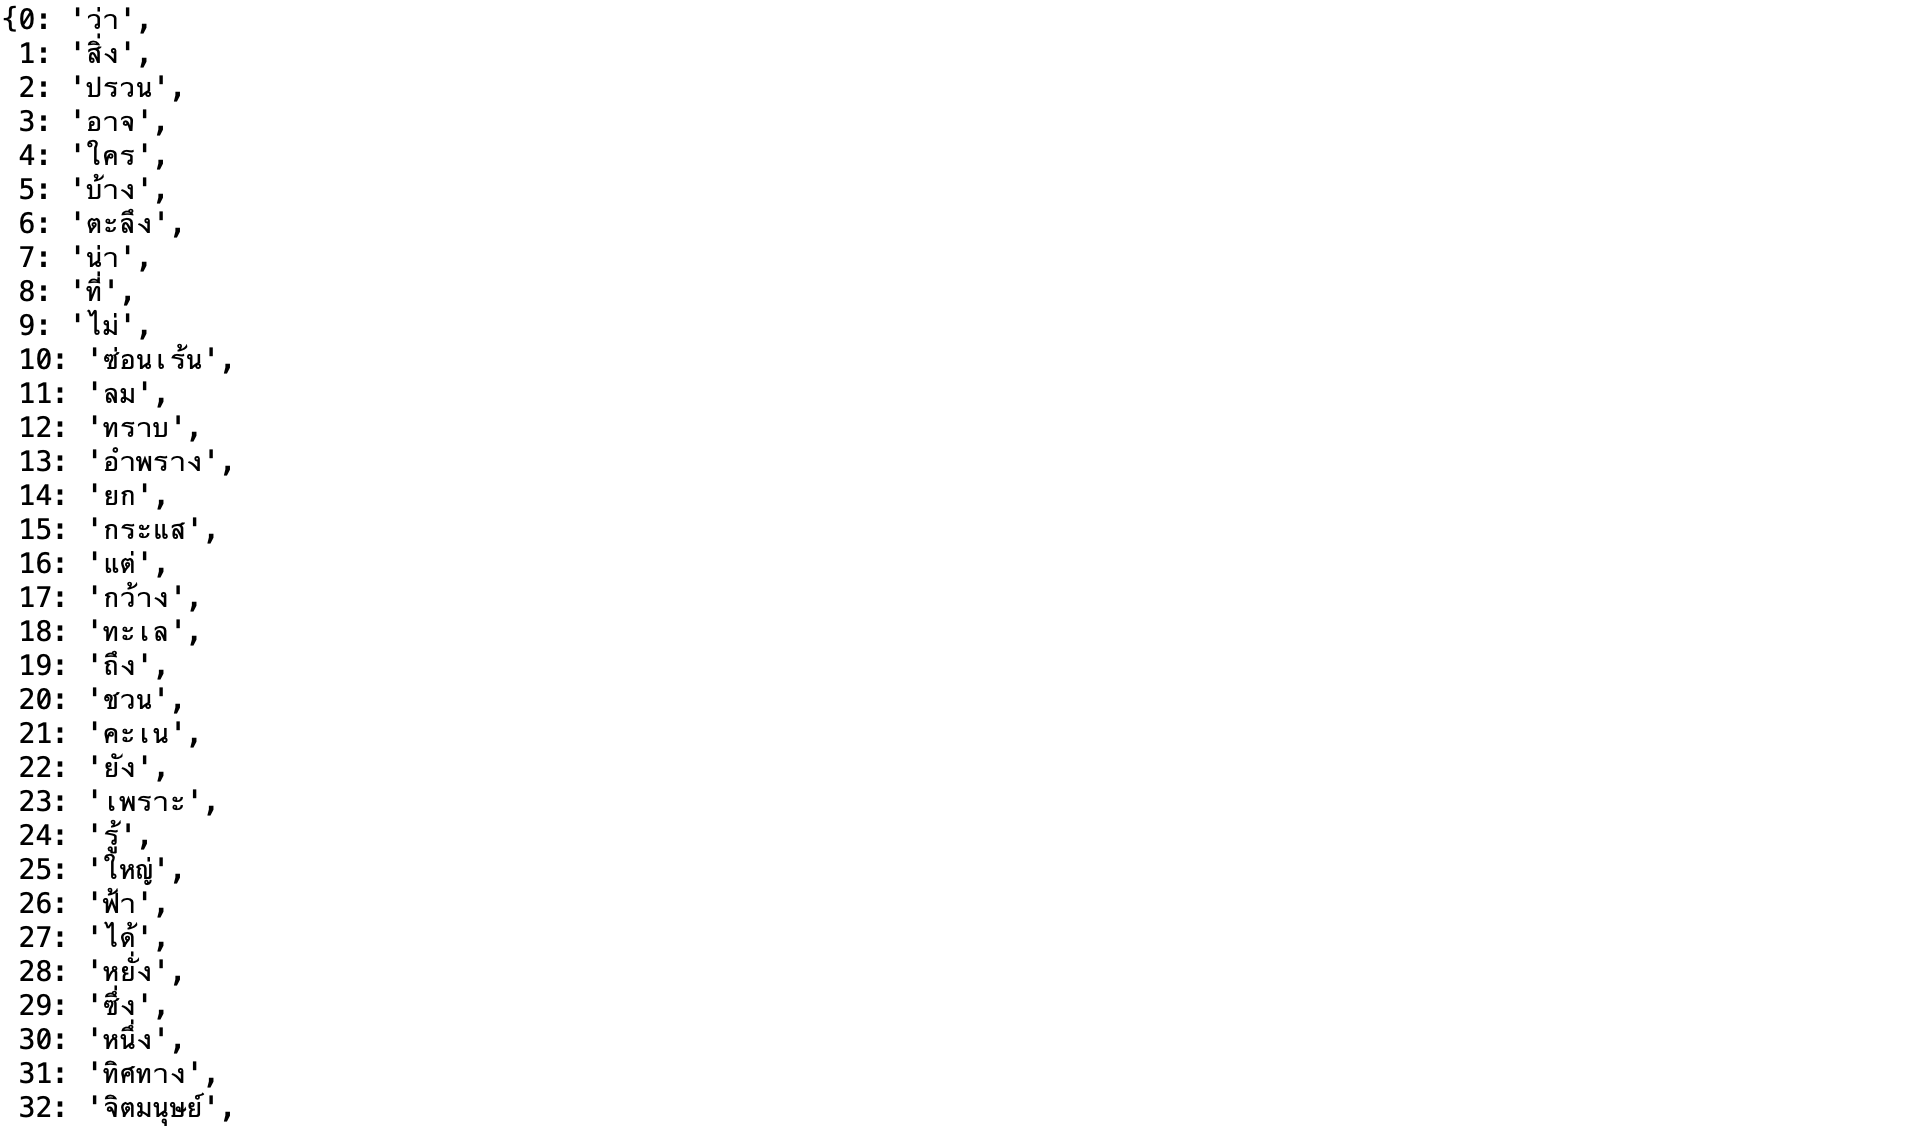
sentences = []
for st in corpus:
    tokens = deepcut.tokenize(st.strip())
    sentences.append(tokens)

sentences
WINDOW_SIZE = 2

data = []
for sentence in sentences:
    for word_index, word in enumerate(sentence):
        for nb_word in sentence[max(word_index - WINDOW_SIZE, 0) : min(word_index + WINDOW_SIZE, len(sentence))+1] :
            if nb_word != word:
                data.append([word, nb_word])

data 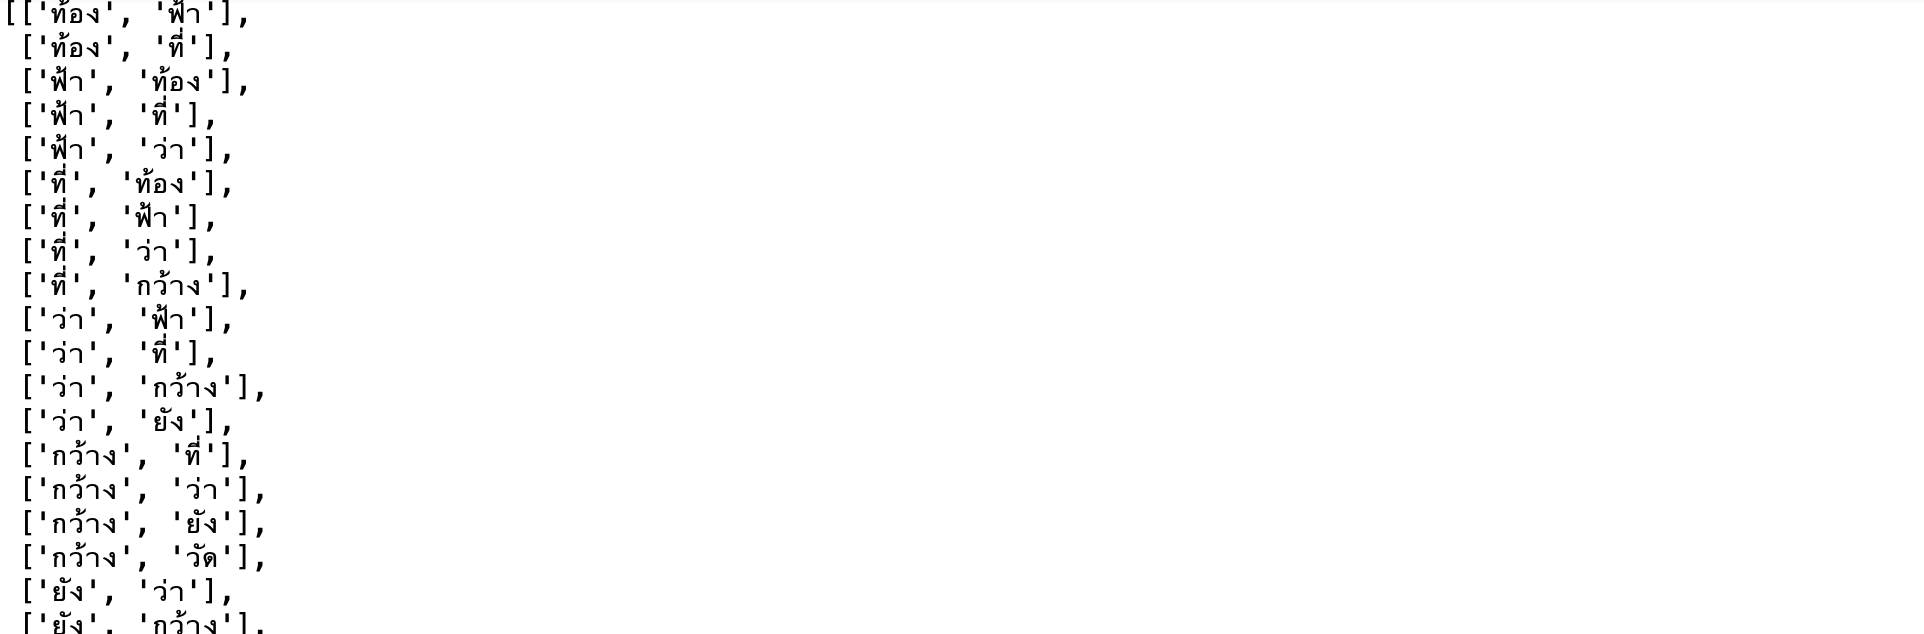
def to_one_hot(data_point_index, vocab_size):
    temp = np.zeros(vocab_size)
    temp[data_point_index] = 1
    return temp

x_train = [] # input word
y_train = [] # output word
for data_word in data:
    x_train.append(to_one_hot(word2int[ data_word[0] ], vocab_size))
    y_train.append(to_one_hot(word2int[ data_word[1] ], vocab_size))

x_train = np.asarray(x_train)
y_train = np.asarray(y_train)

x_train.shape, y_train.shape
x_train
y_train
- กำหนดจุด Checkpoint ของ Model
filename = 'w2v.keras'
checkpoint = ModelCheckpoint(filename, monitor='loss', verbose=1, save_best_only=True, mode='min')- นิยาม Model แบบ Encoder-Decoder จำนวน 2 Layer
model = Sequential()
model.add(Dense(16, activation='relu', input_shape=(vocab_size,)))
model.add(Dropout(0.25))
model.add(Dense(vocab_size, activation = "softmax"))
- Compile Model
model.compile(optimizer='adam', loss='categorical_crossentropy')

model.summary()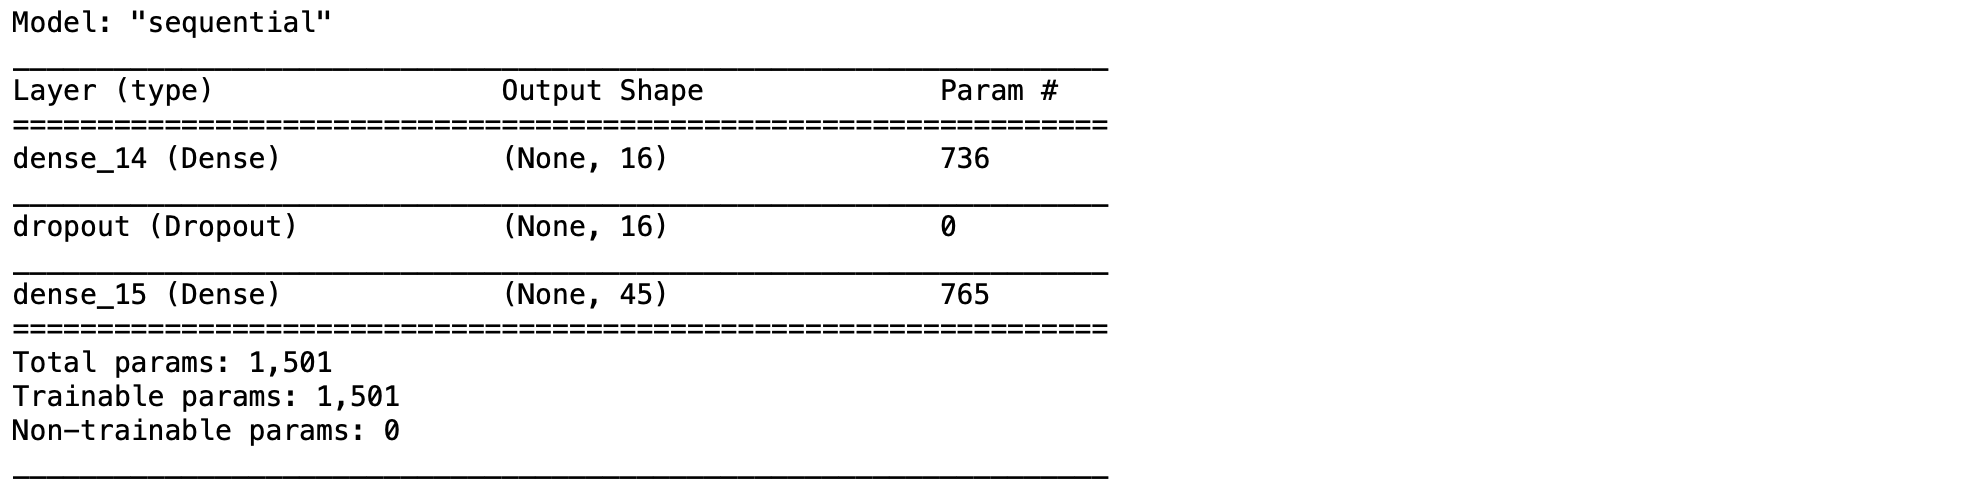
- สร้าง Callback Function สำหรับ Plot ค่า Loss แบบ Realtime
class PlotLosses(tensorflow.keras.callbacks.Callback):
    def on_train_begin(self, logs={}):
        self.i = 0
        self.x = []
        self.losses = []

        self.fig = plt.figure()

        self.logs = []

    def on_epoch_end(self, epoch, logs={}):

        self.logs.append(logs)
        self.x.append(self.i)
        self.losses.append(logs.get('loss'))
        self.i += 1

        clear_output(wait=True)
        plt.plot(self.x, self.losses, label="loss")
        plt.legend()
        plt.show();

plot_losses = PlotLosses()- Train Model
history = model.fit(x_train,y_train, batch_size = 1, epochs=EPOCH, verbose=1, callbacks = [checkpoint, plot_losses])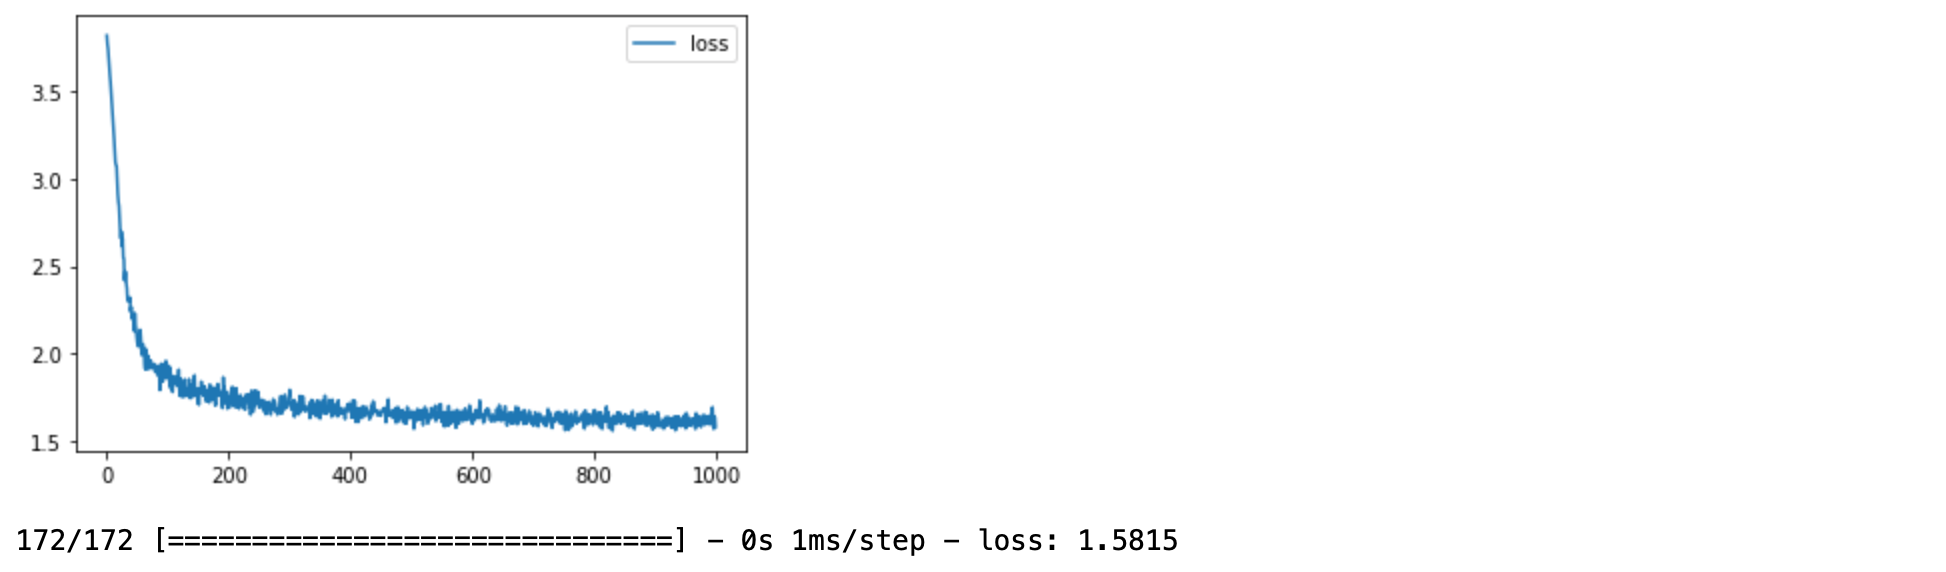
- Load Model
checkpoint_model = load_model(filename)- ดึงค่า Weight และ Bias จาก Hidden Layer
wb1 = checkpoint_model.layers[0].get_weights()
wb1[0].shape, wb1[1].shape
- คำนวน Vector จากการนำ Weight + Bias
w1 = wb1[0]
b1 = wb1[1]

vectors = w1 + b1

vectors.shape
- Save History
with open('w2v_history_model', 'wb') as file:
p.dump(history.history, file)- Load History
with open('w2v_history_model', 'rb') as file:
his = p.load(file)- Plot ค่า Loss
h1 = go.Scatter(y=his['loss'],
                    mode="lines", line=dict(
                    width=2,
                    color='blue'),
                    name="loss"
                   )

data = [h1]
layout1 = go.Layout(title='Loss',
                   xaxis=dict(title='epochs'),
                   yaxis=dict(title=''))
fig1 = go.Figure(data = data, layout=layout1)
plotly.offline.iplot(fig1, filename="w2v")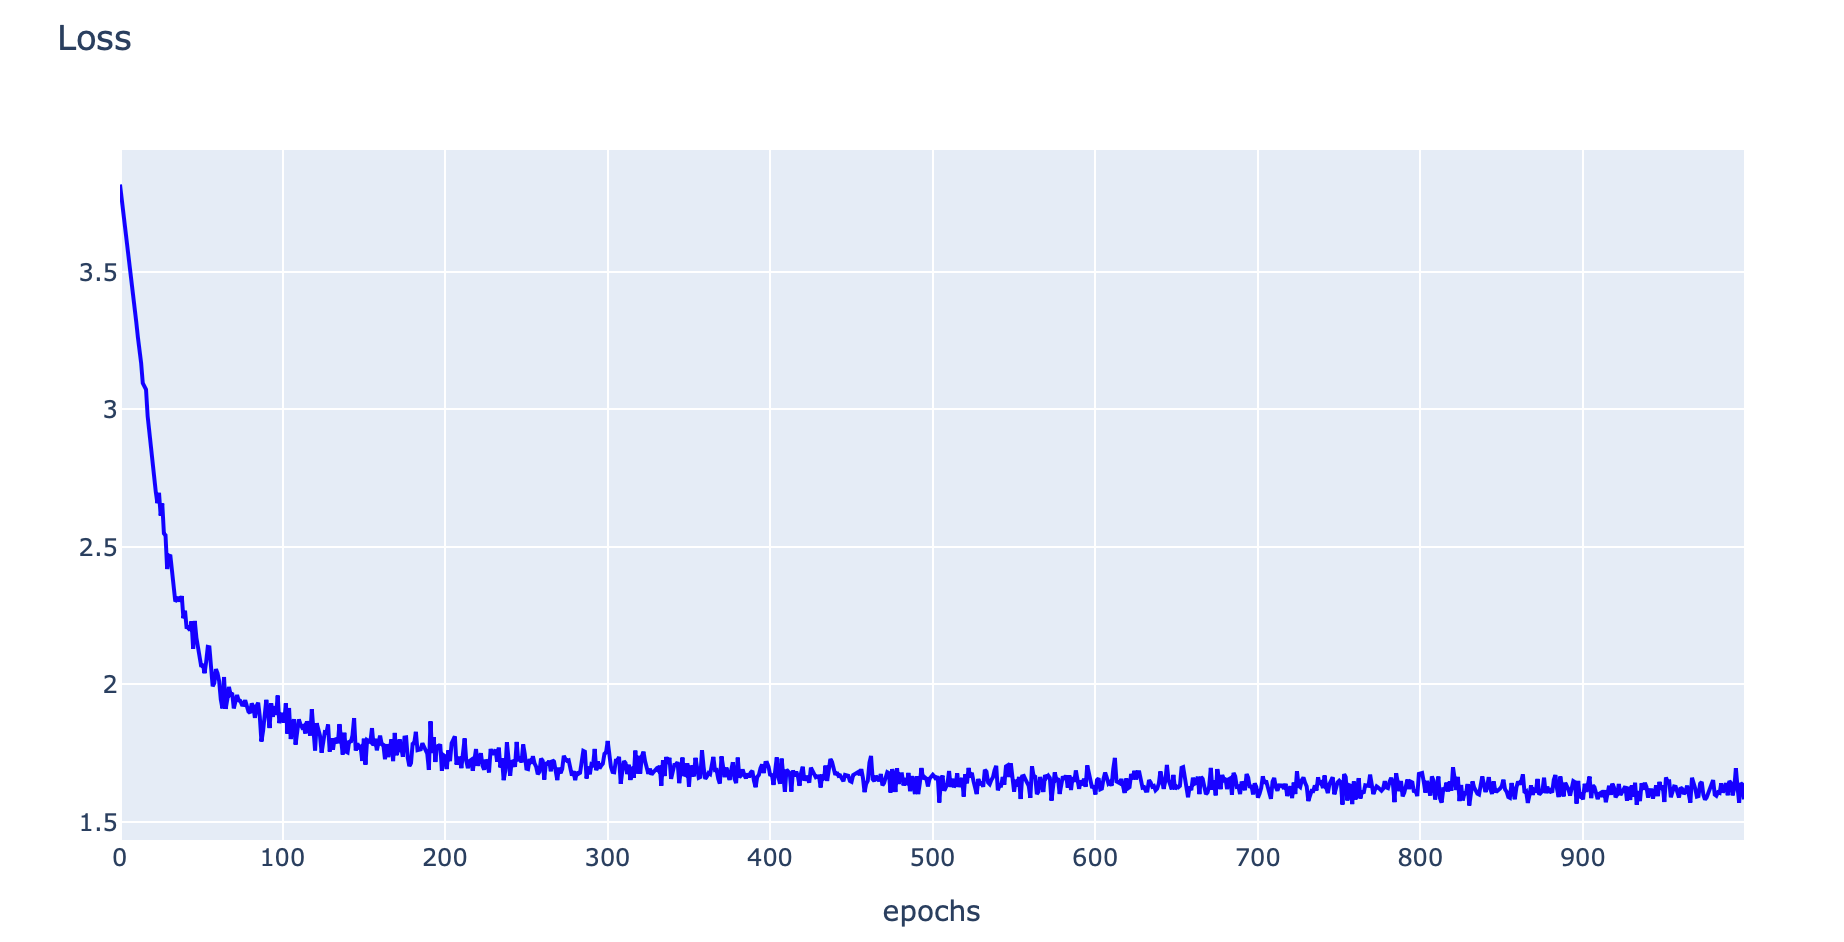
- นิยาม Functiom euclidean_dist, cosine_dist, find_closest_euclidean และ find_closest_cosine เพื่อค้นหาคำที่อยู่ใกล้
def euclidean_dist(vec1, vec2):
    return np.sqrt(np.sum((vec1-vec2)**2))
def cosine_dist(vec1, vec2):
return cosine_distance(vec1, vec2)def find_closest_euclidean(word_index, vectors):
min_dist = 10000
min_index = -1
query_vector = vectors[word_index]
for index, vector in enumerate(vectors):
if euclidean_dist(vector, query_vector) < min_dist and not np.array_equal(vector, query_vector):
min_dist = euclidean_dist(vector, query_vector)
min_index = index
return min_indexdef find_closest_cosine(word_index, vectors):
min_dist = 10000
min_index = -1
query_vector = vectors[word_index]
for index, vector in enumerate(vectors):
if cosine_dist(vector, query_vector) < min_dist and not np.array_equal(vector, query_vector):
min_dist = cosine_dist(vector, query_vector)
min_index = index
return min_index- ค้นหาคำที่อยู่ใกล้ "ฟ้า", "จิตมนุษย์" และ "วัดดู" ด้วย Euclidean Distance
print(int2word[find_closest_euclidean(word2int['ฟ้า'], vectors)])
print(int2word[find_closest_euclidean(word2int['จิตมนุษย์'], vectors)])
print(int2word[find_closest_euclidean(word2int['วัดดู'], vectors)])
กว้าง
สุด
ได้
- ค้นหาคำที่อยู่ใกล้ "ฟ้า", "จิตมนุษย์" และ "วัดดู" ด้วย Cosine Distance
print(int2word[find_closest_cosine(word2int['ฟ้า'], vectors)])
print(int2word[find_closest_cosine(word2int['จิตมนุษย์'], vectors)])
print(int2word[find_closest_cosine(word2int['วัดดู'], vectors)])
ทะเล
สุด
ได้
- บันทึก Vector พร้อม Label ลงไฟล์ w2v.tsv และ label.tsv เพื่อนำไป Plot ที่ https://projector.tensorflow.org
import csv
with open('w2v.tsv', 'w') as out_file:
tsv_writer = csv.writer(out_file, delimiter='\t')
for v in vectors:
tsv_writer.writerow(v)
with open('label.tsv', 'w') as out_file:
tsv_writer = csv.writer(out_file, delimiter='\t')
for word in word2int:
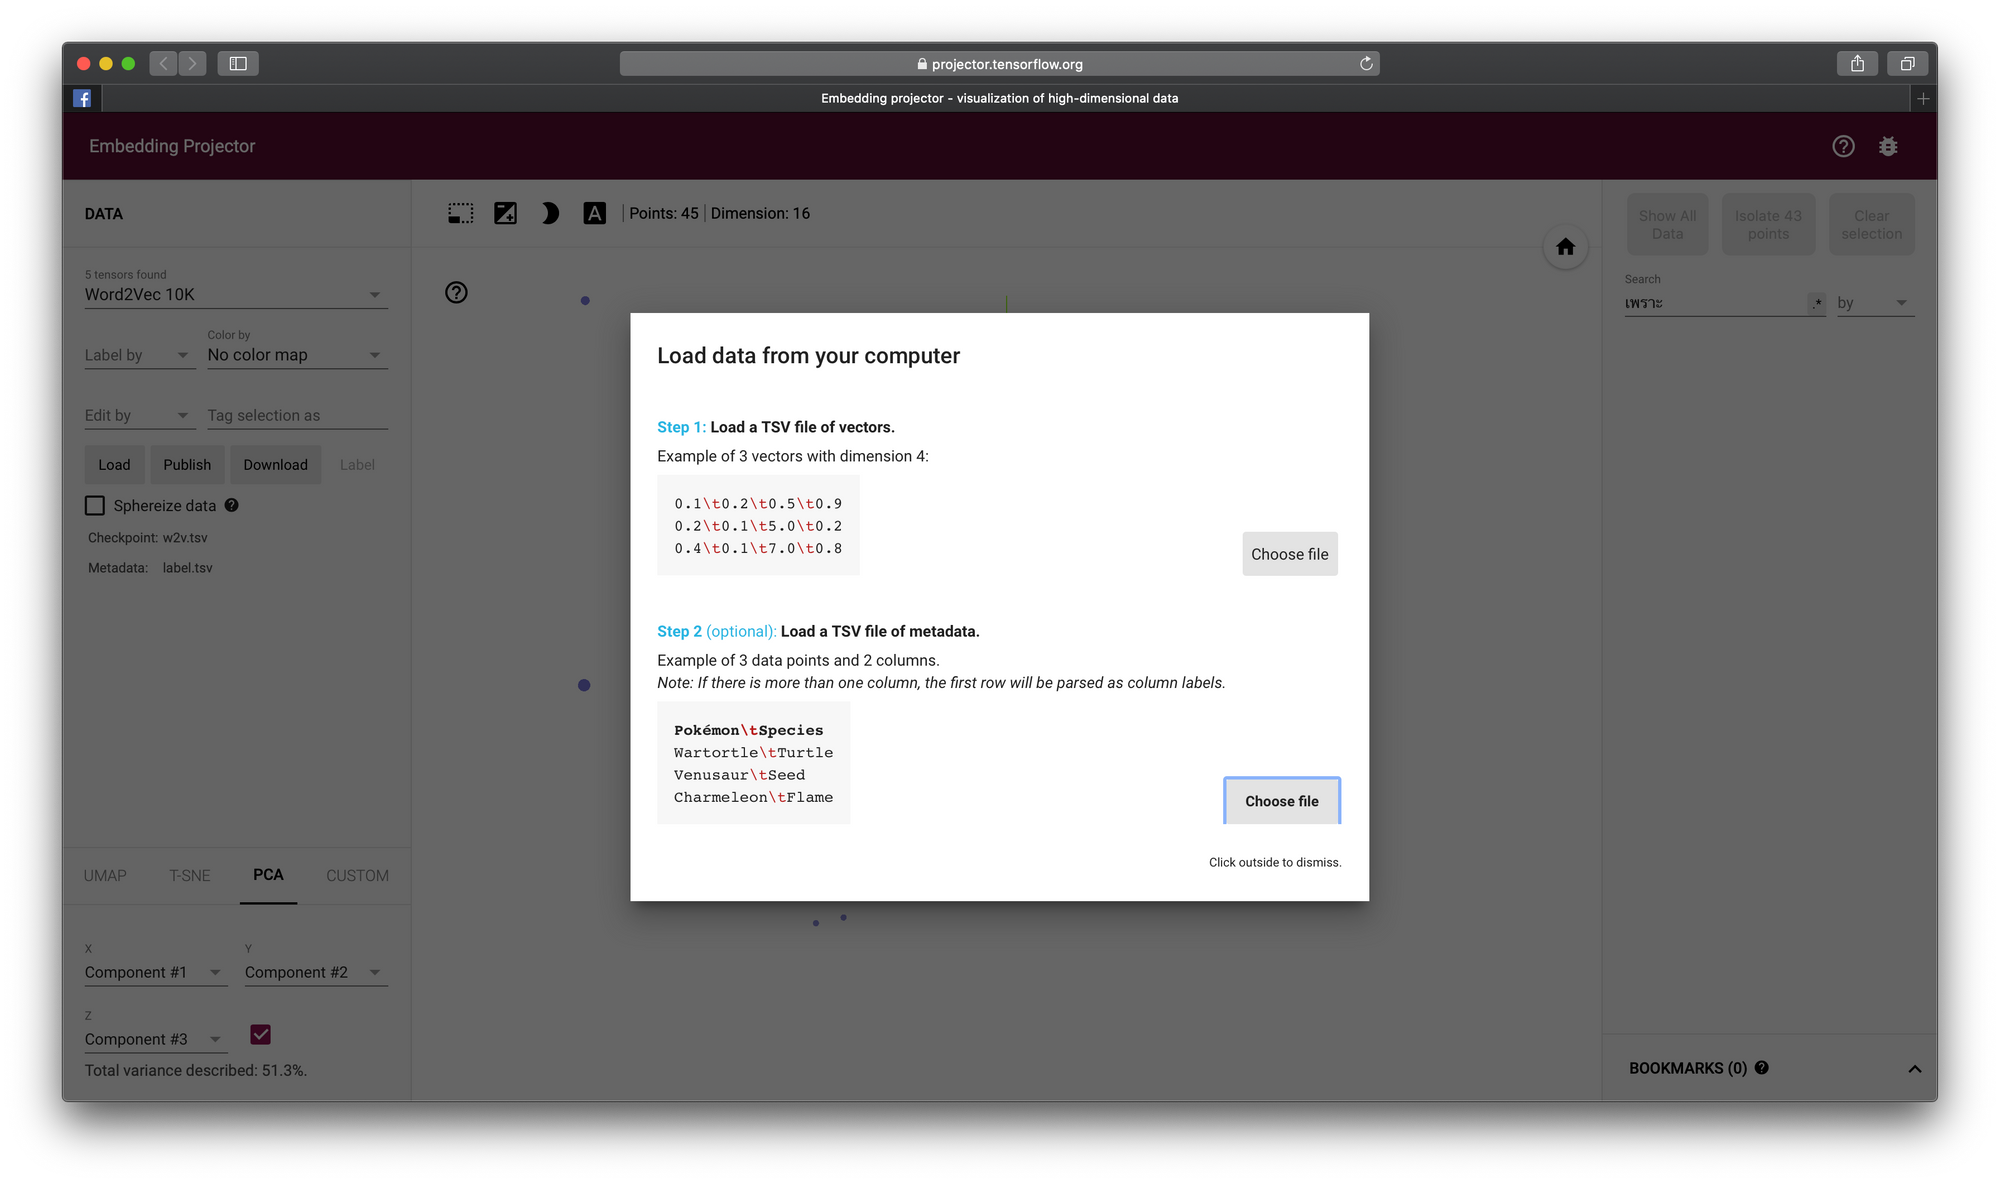
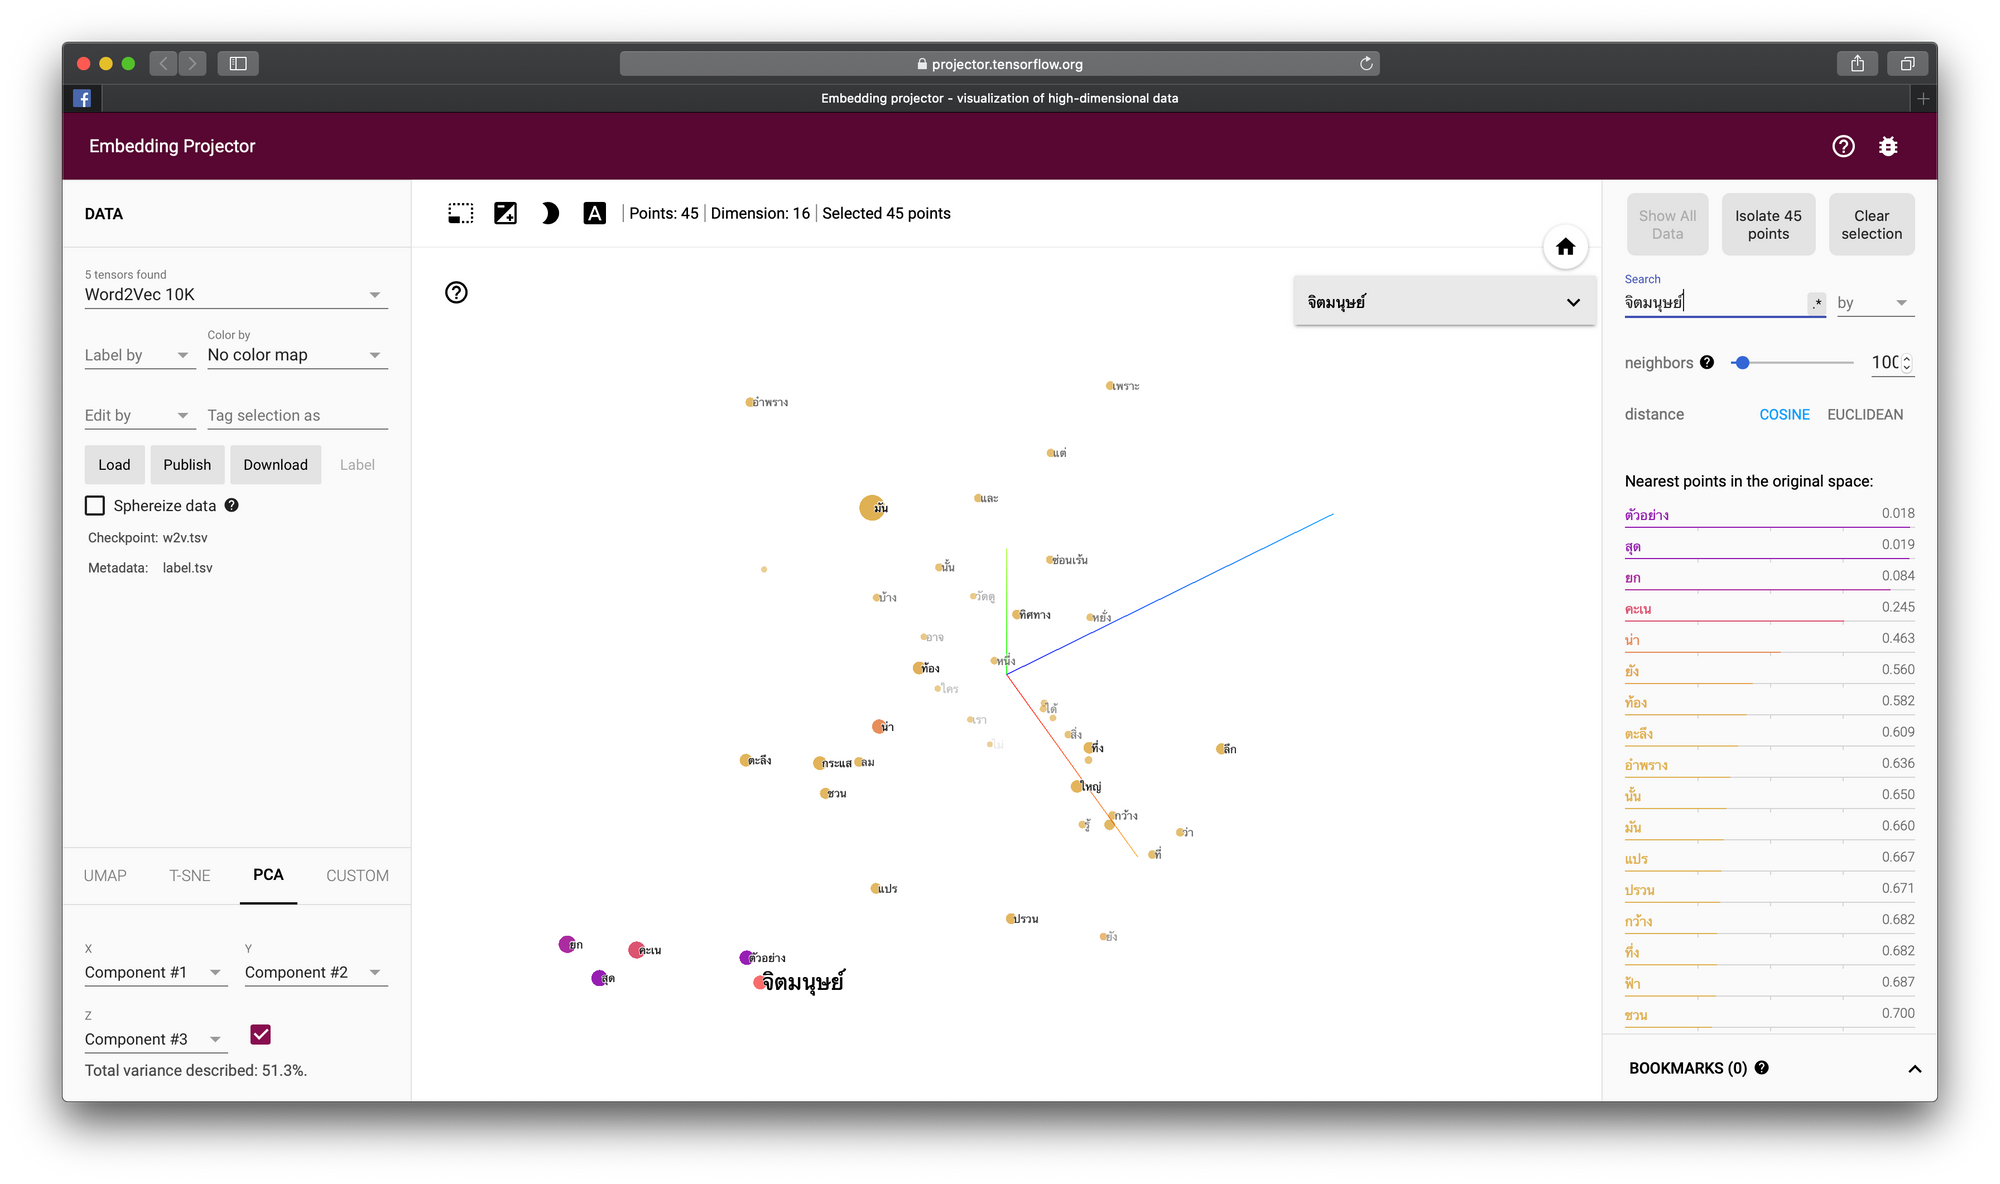
tsv_writer.writerow([word])- ไปยัง https://projector.tensorflow.org กดที่ปุ่ม Load เพื่อ Load ไฟล์ w2v.tsv และ label.tsv แล้วค้นหาคำว่า "จิตมนุษย์"