Apple M1 Speed Test


บทความโดย ผศ.ดร.ณัฐโชติ พรหมฤทธิ์
ภาควิชาคอมพิวเตอร์
คณะวิทยาศาสตร์
มหาวิทยาลัยศิลปากร
TensorFlow เป็นหนึ่งใน Deep-learning Framework ยอดนิยมที่ใช้ในการพัฒนางานทางด้าน AI และ Data Science ที่สามารถเพิ่มความเร็วในการประมวลผลได้ด้วย NVIDIA GPU และ CUDA Toolkit แต่น่าเสียดายที่ Apple ได้หยุดให้การสนับสนุน GPU ของ NVIDIA มาระยะเวลาหนึ่งแล้ว
จนกระทั่งในยุคสมัยของ Apple Silicon เราจึงสามารถใช้งาน TensorFlow 2.4 เวอร์ชัน Fork ที่ Apple ได้ปรับแต่งให้สามารถทำงานได้ดีขึ้น บนเครื่องคอมพิวเตอร์ที่ใช้ชิป M1 (รวมทั้งรุ่นที่ใช้ CPU Intel) ทำให้เราสามารถดึงประสิทธิภาพ CPU และ GPU 8 Core ของ M1 ออกมาได้อย่างเต็มที่
ในบทความนี้เราจะทดลองเปรียบเทียบความเร็วในการ Train Deep-learning Model ด้วย TensorFlow 2.4 บน MacBook Pro M1, MacBook Pro Intel Core i7 ปี 2018 และ Tesla T4 GPU (Google Colab) ซึ่งผลลัพธ์จะออกมาเป็นอย่างไร ผู้อ่านสามารถติดตามได้ในหัวข้อต่อไปครับ
Requirements
เพื่อจะติดตั้ง TensorFlow เวอร์ชัน Fork เราจะต้องเตรียม Software ต่างๆ ให้พร้อม ดังนี้
macOS 11.0+
Xcode Command Line Tools
Python 3.8
โดยเราสามารถตรวจสอบ Version ของ macOS ได้จากคำสั่ง sw_vers -productVersion
sw_vers -productVersion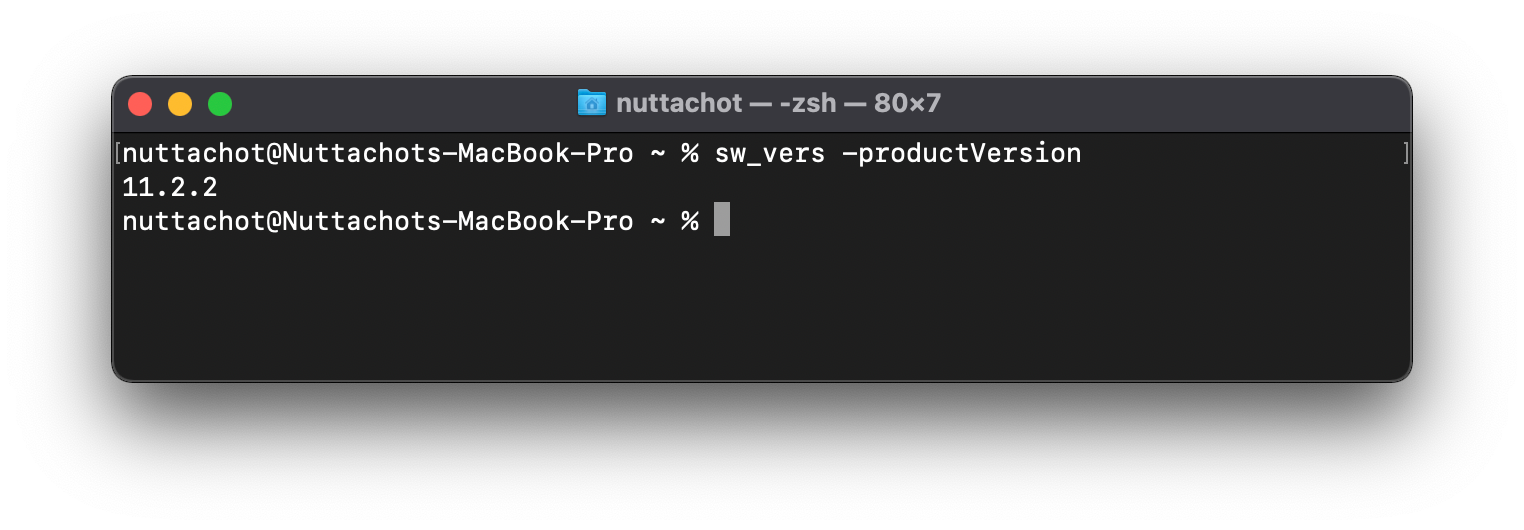
และตรวจสอบ Xcode Command Line Tools ด้วยคำสั่ง which xcrun
which xcrun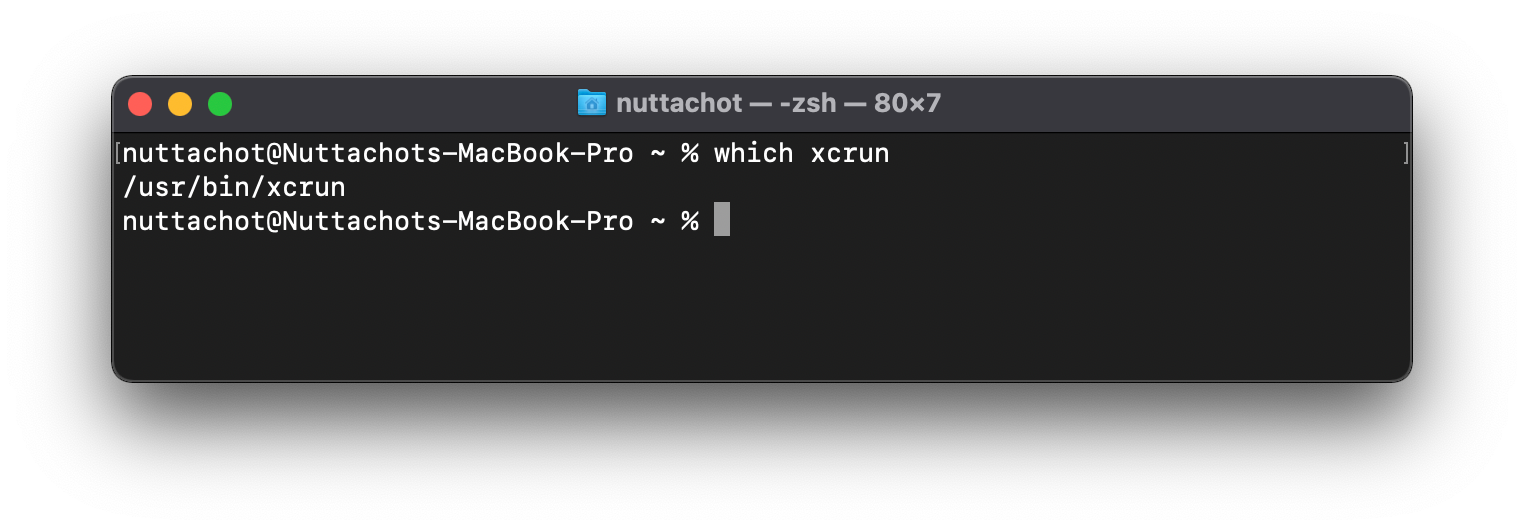
ซึ่งถ้าใน Terminal ของเราไม่แสดง Path /usr/bin/xcrun ตามภาพด้านบน จะต้องมีการติดตั้ง Xcode Command Line Tools ก่อน ด้วยคำสั่ง xcode-select --install ครับ
xcode-select --install
สำหรับ Python 3.8 เราจะติดตั้งมันด้วย Conda จาก Miniforge
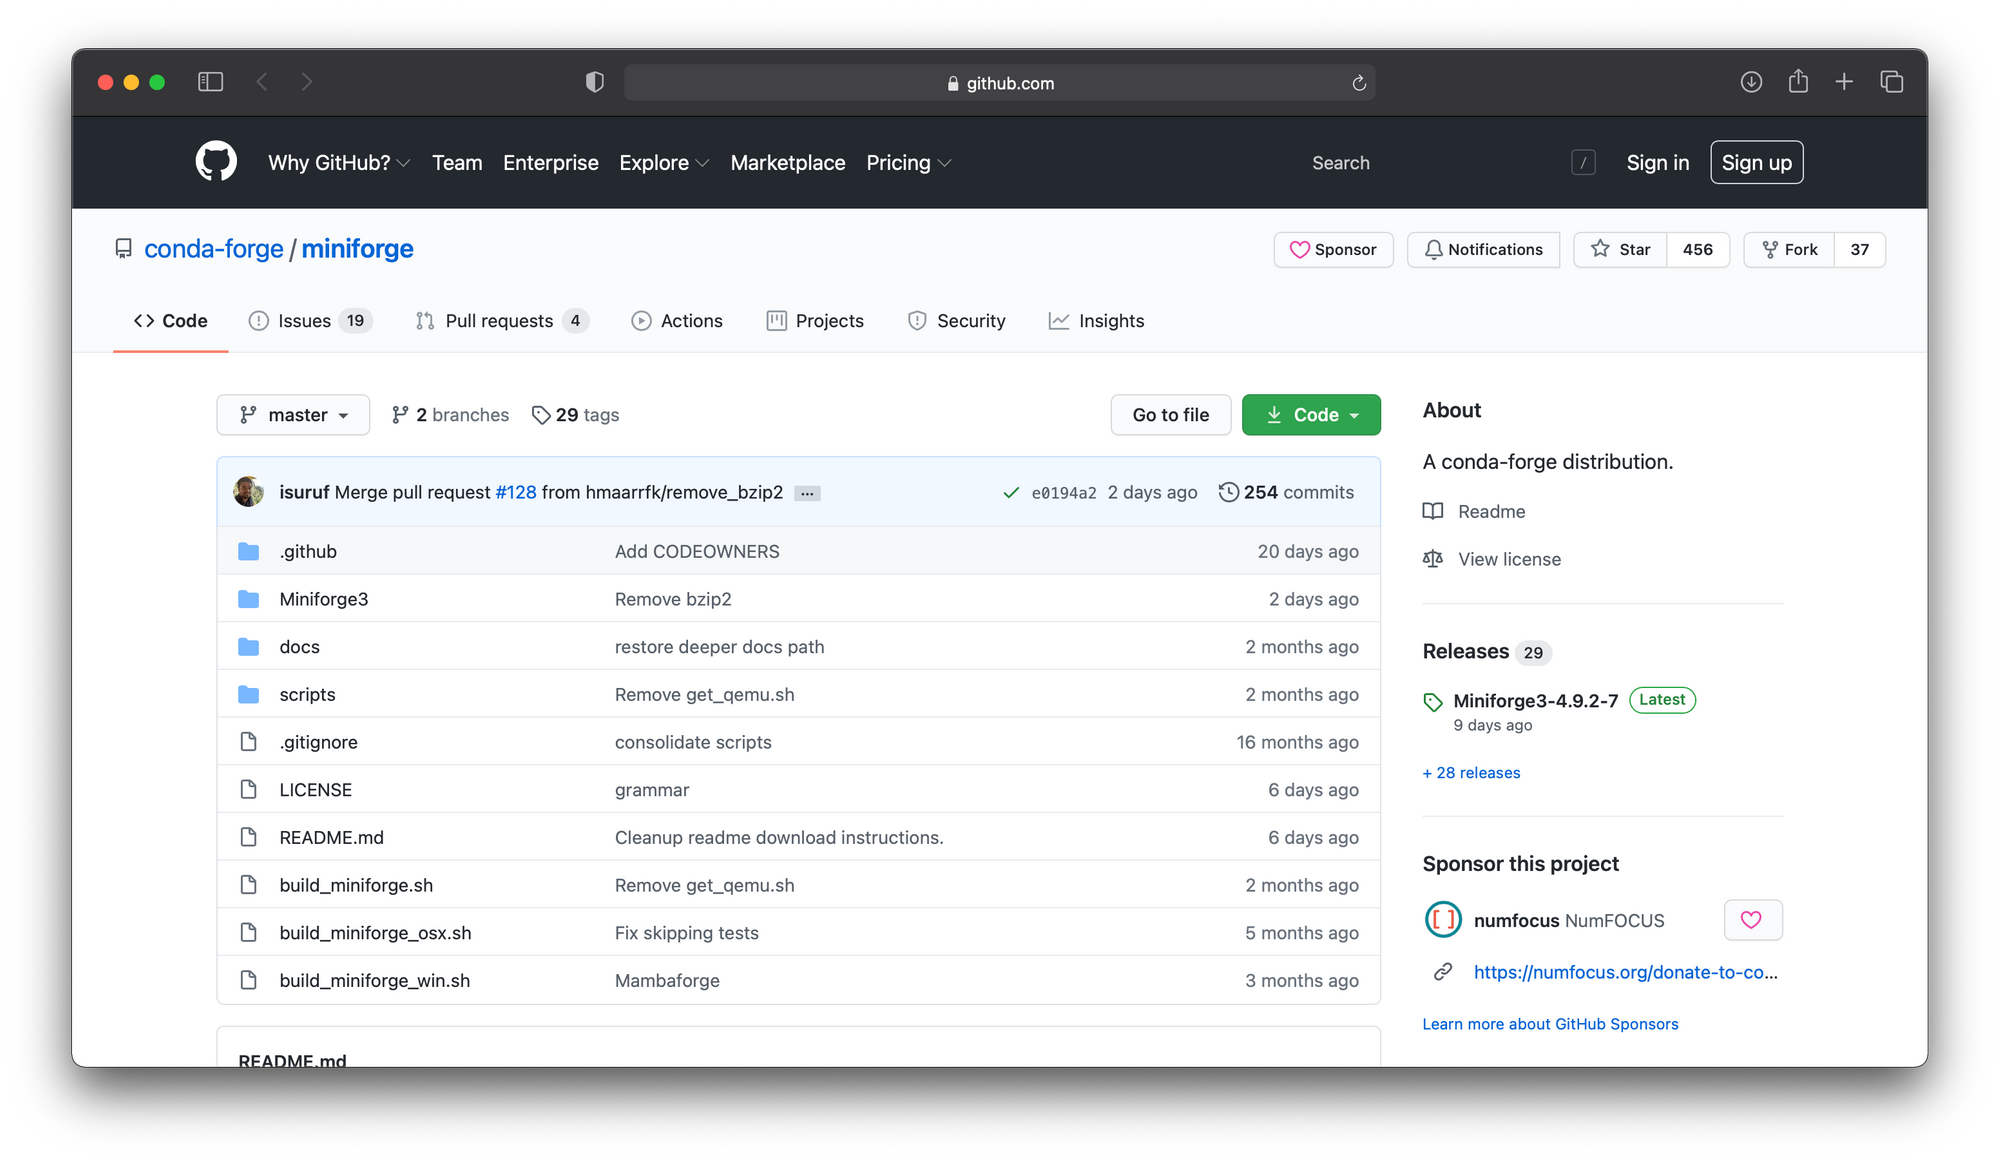
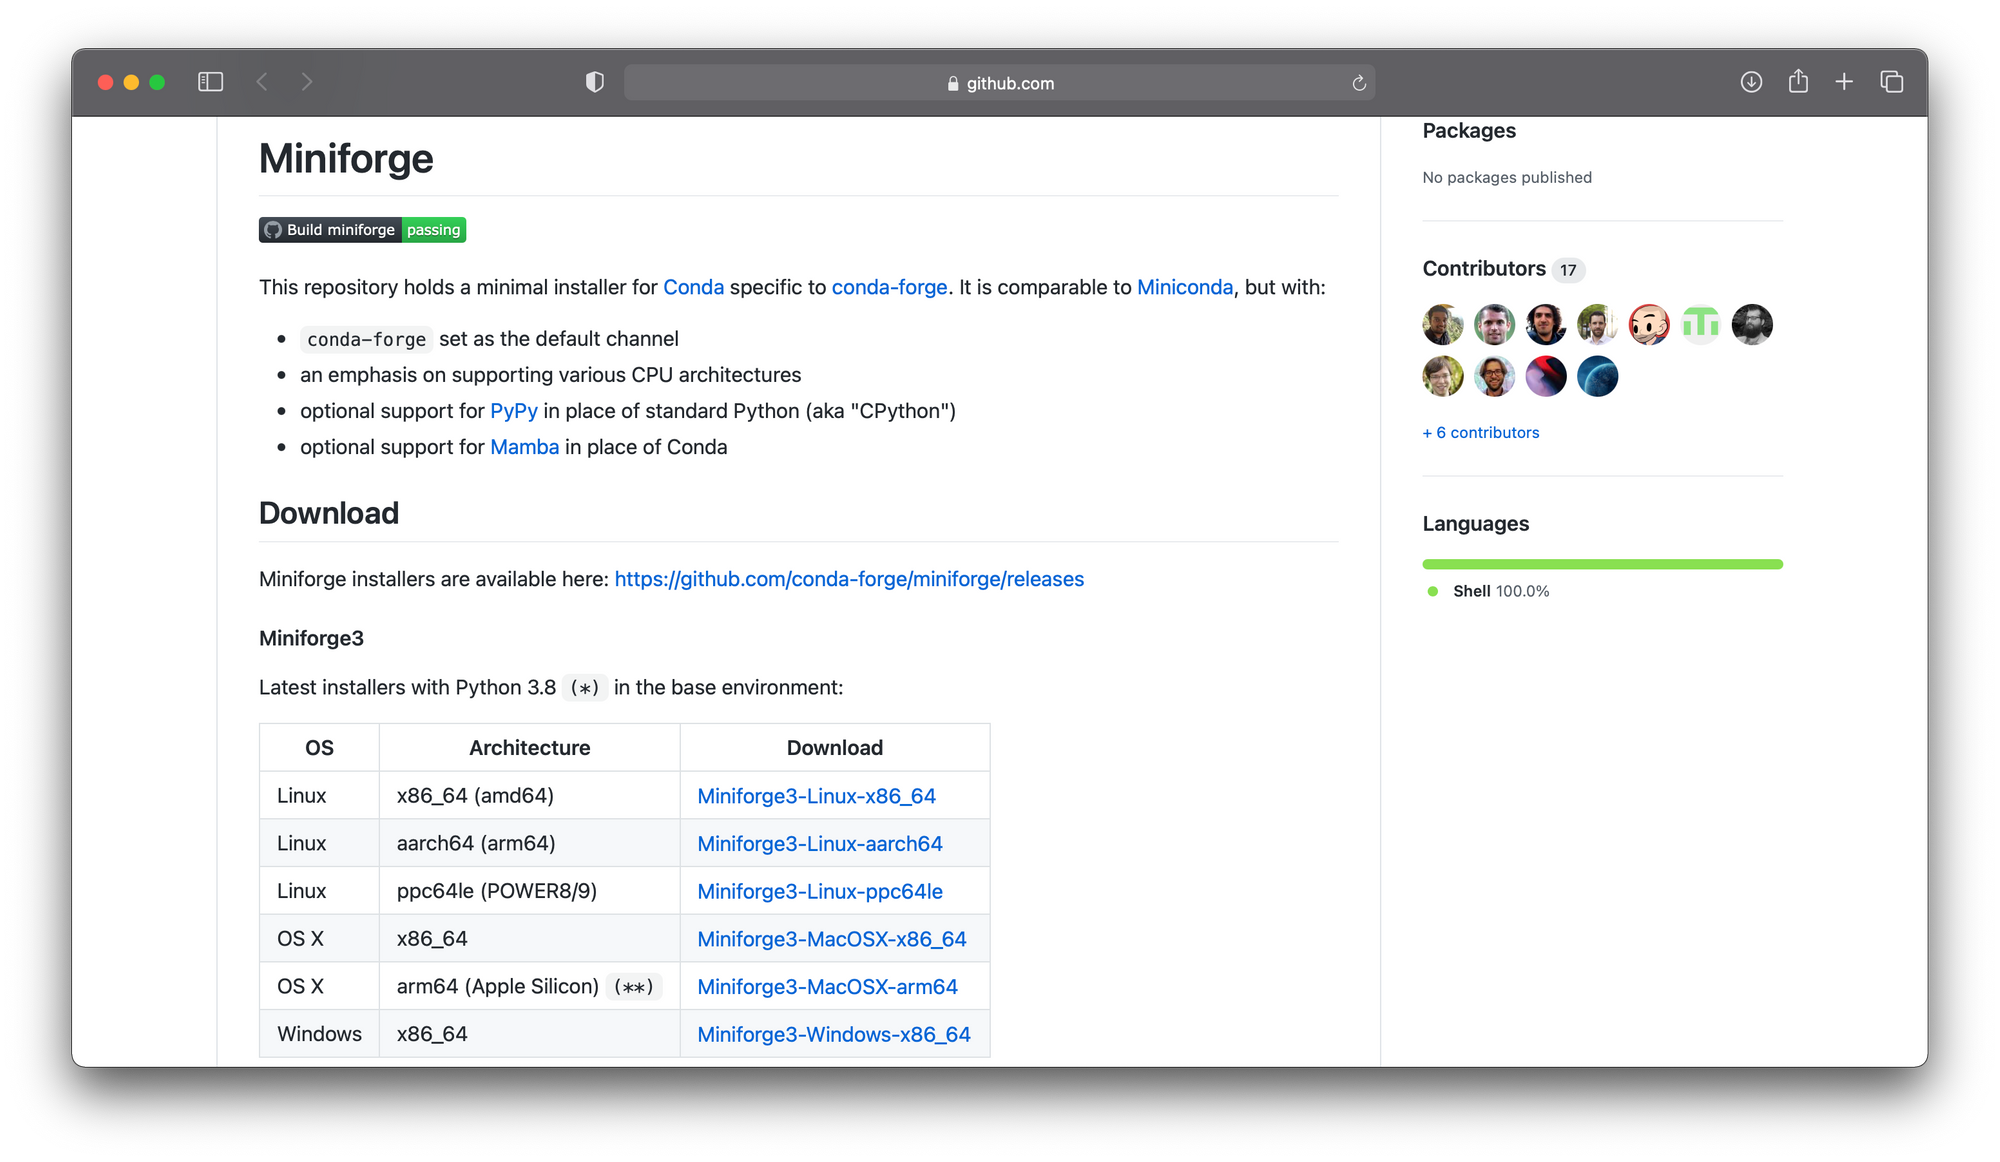
โดยเลือก Download Miniforge ที่จะติดตั้งแบบ arm64 (Apple Silicon) แล้วรันโปรแกรมด้วยคำสั่งดังนี้
chmod +x Miniforge3-MacOSX-arm64.sh

./Miniforge3-MacOSX-arm64.sh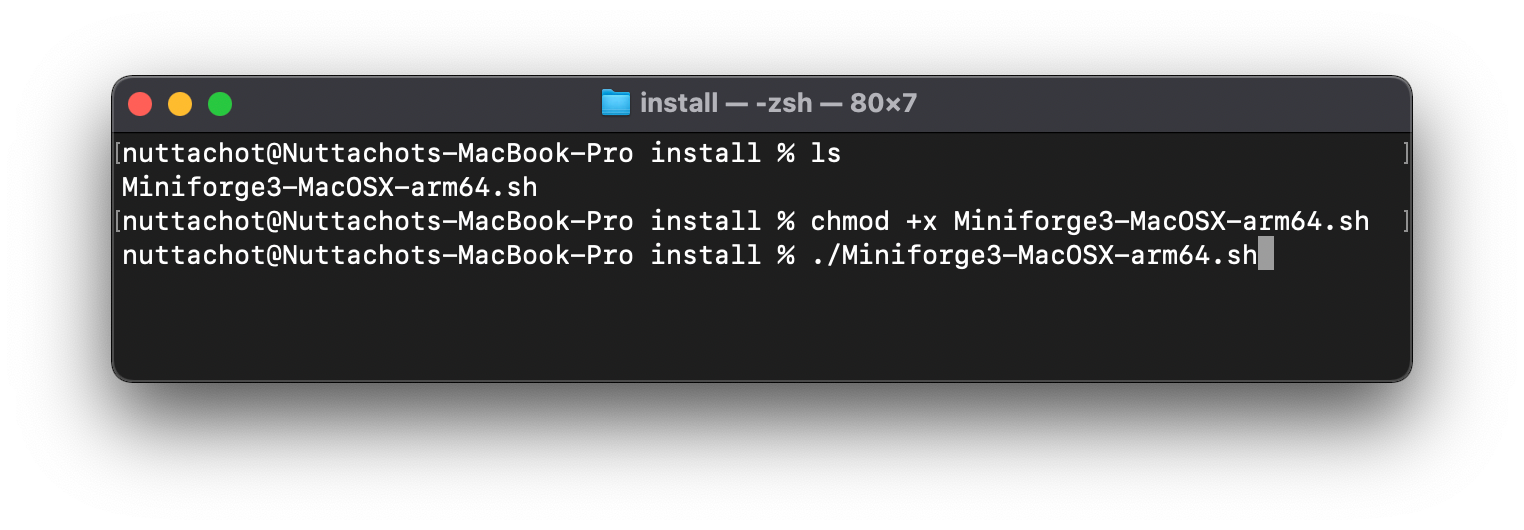
ซึ่งเมื่อติดตั้งเสร็จแล้วเราควรได้ผลลัพธ์คล้ายภาพด้านล่างเมื่อใช้คำสั่ง which python และ which pip เพื่อตรวจสอบ Path ของ Python และ pip
which python

which pip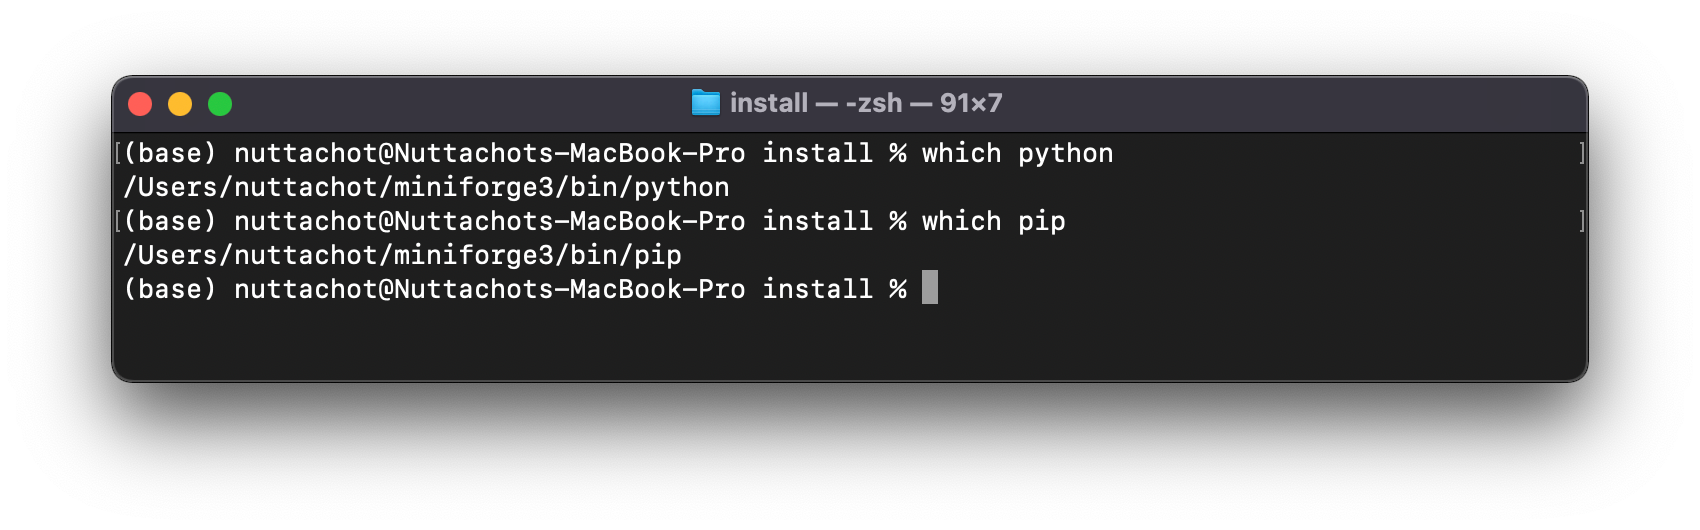
พิมพ์ python ใน Terminal และดู Activity Monitor เพื่อยืนยันว่ามันถูกรันอยู่บน Apple Architecture หรือไม่
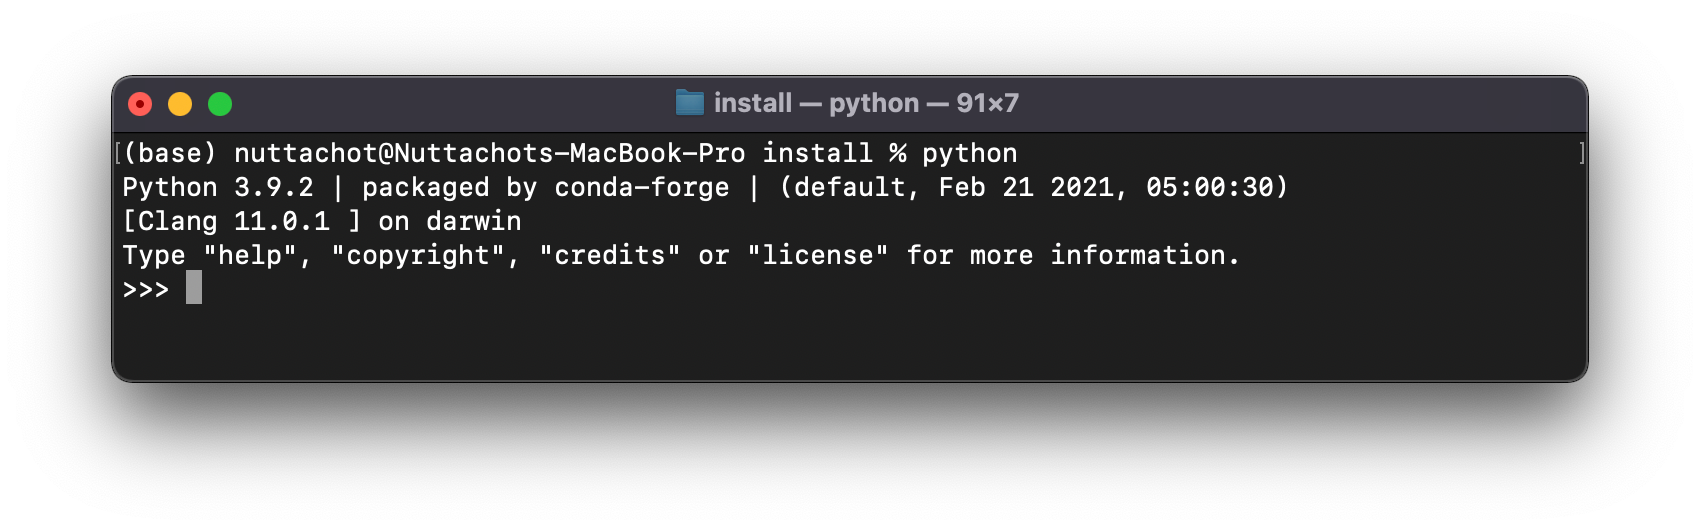
ซึ่งจะเห็นว่า Python ที่ติดมากับ Miniforge จะเป็น Python 3.9 ดังนั้นเราจะติดตั้ง Python 3.8 บน Environment ใหม่ด้วยคำสั่ง conda env create
environment.yml
ก่อนจะสร้าง Environment ใหม่ เราจะเตรียมรายการของ Library ที่ต้องติดตั้ง โดยบันทึกลงไฟล์ environment.yml ดังนี้
name: tfm1
channels:
  - conda-forge
  - nodefaults
dependencies:
  - grpcio
  - h5py
  - ipython
  - numpy
  - pip
  - python=3.8.6
  - scipy
  - termcolor
  - typeguard
  - wheel
  - absl-py
  - astunparse
  - python-flatbuffers
  - gast
  - google-pasta
  - keras-preprocessing
  - opt_einsum
  - protobuf
  - tensorboard
  - tensorflow-estimator
  - termcolor
  - typing_extensions
  - wrapt
  - pandas
  - matplotlib
  - scikit-learn
  - jupyterlab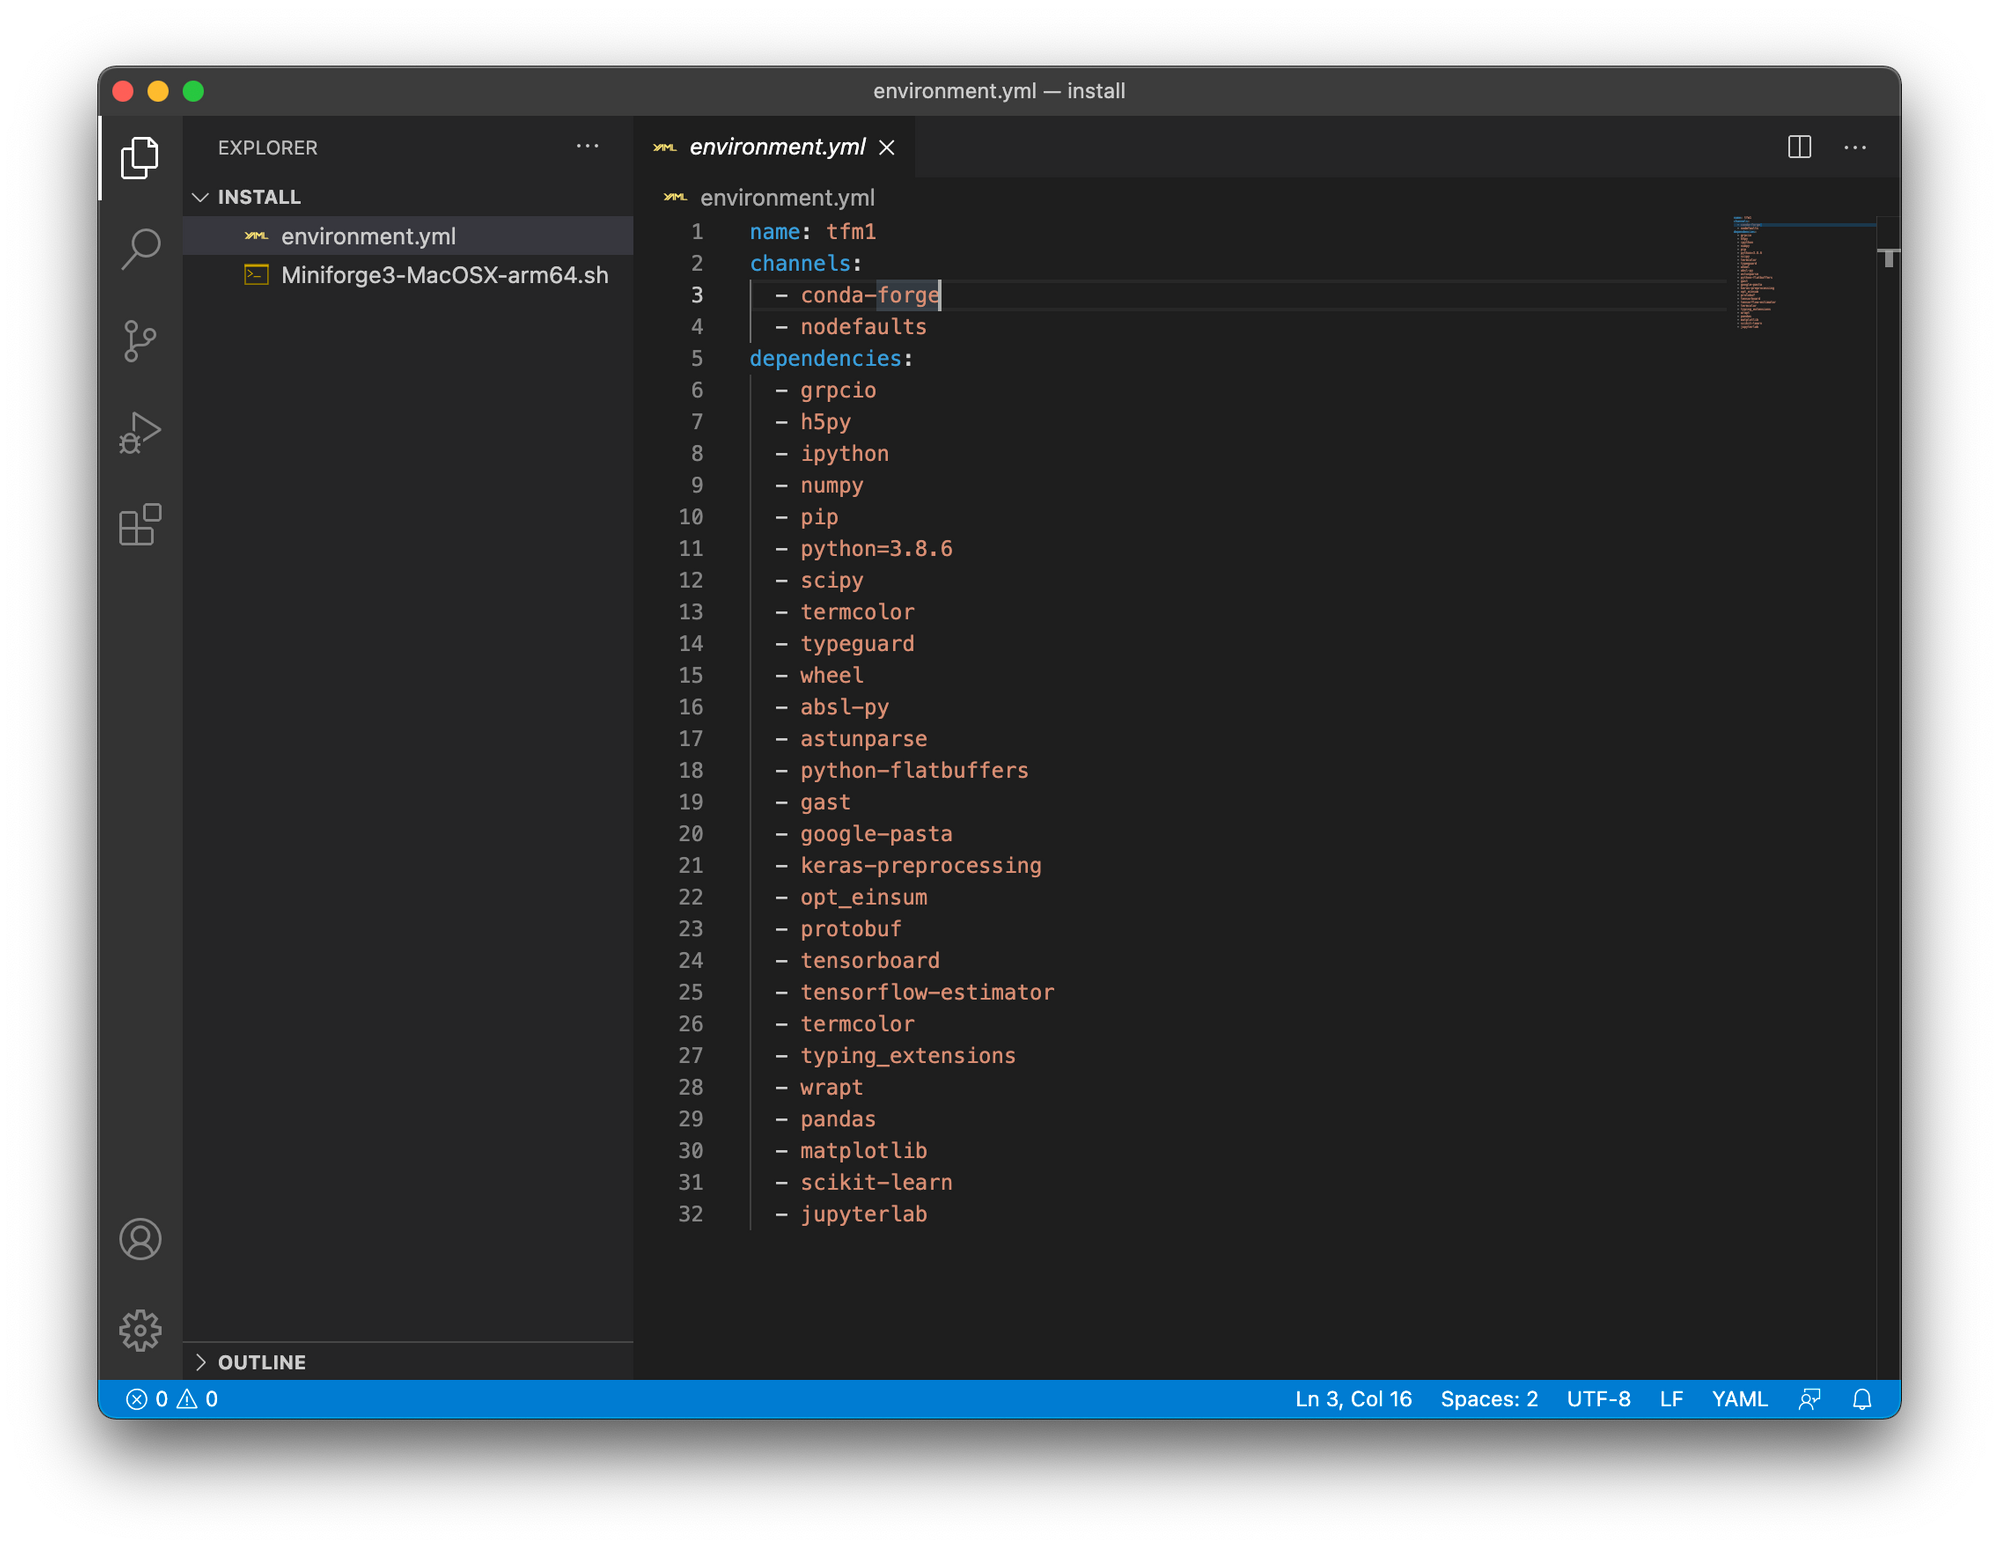
Create Conda Environment
สร้าง Conda Environment ชื่อ tfm1 ด้วยคำสั่งดังนี้
conda env create --file=environment.ymlInstall TensorFlow 2.4
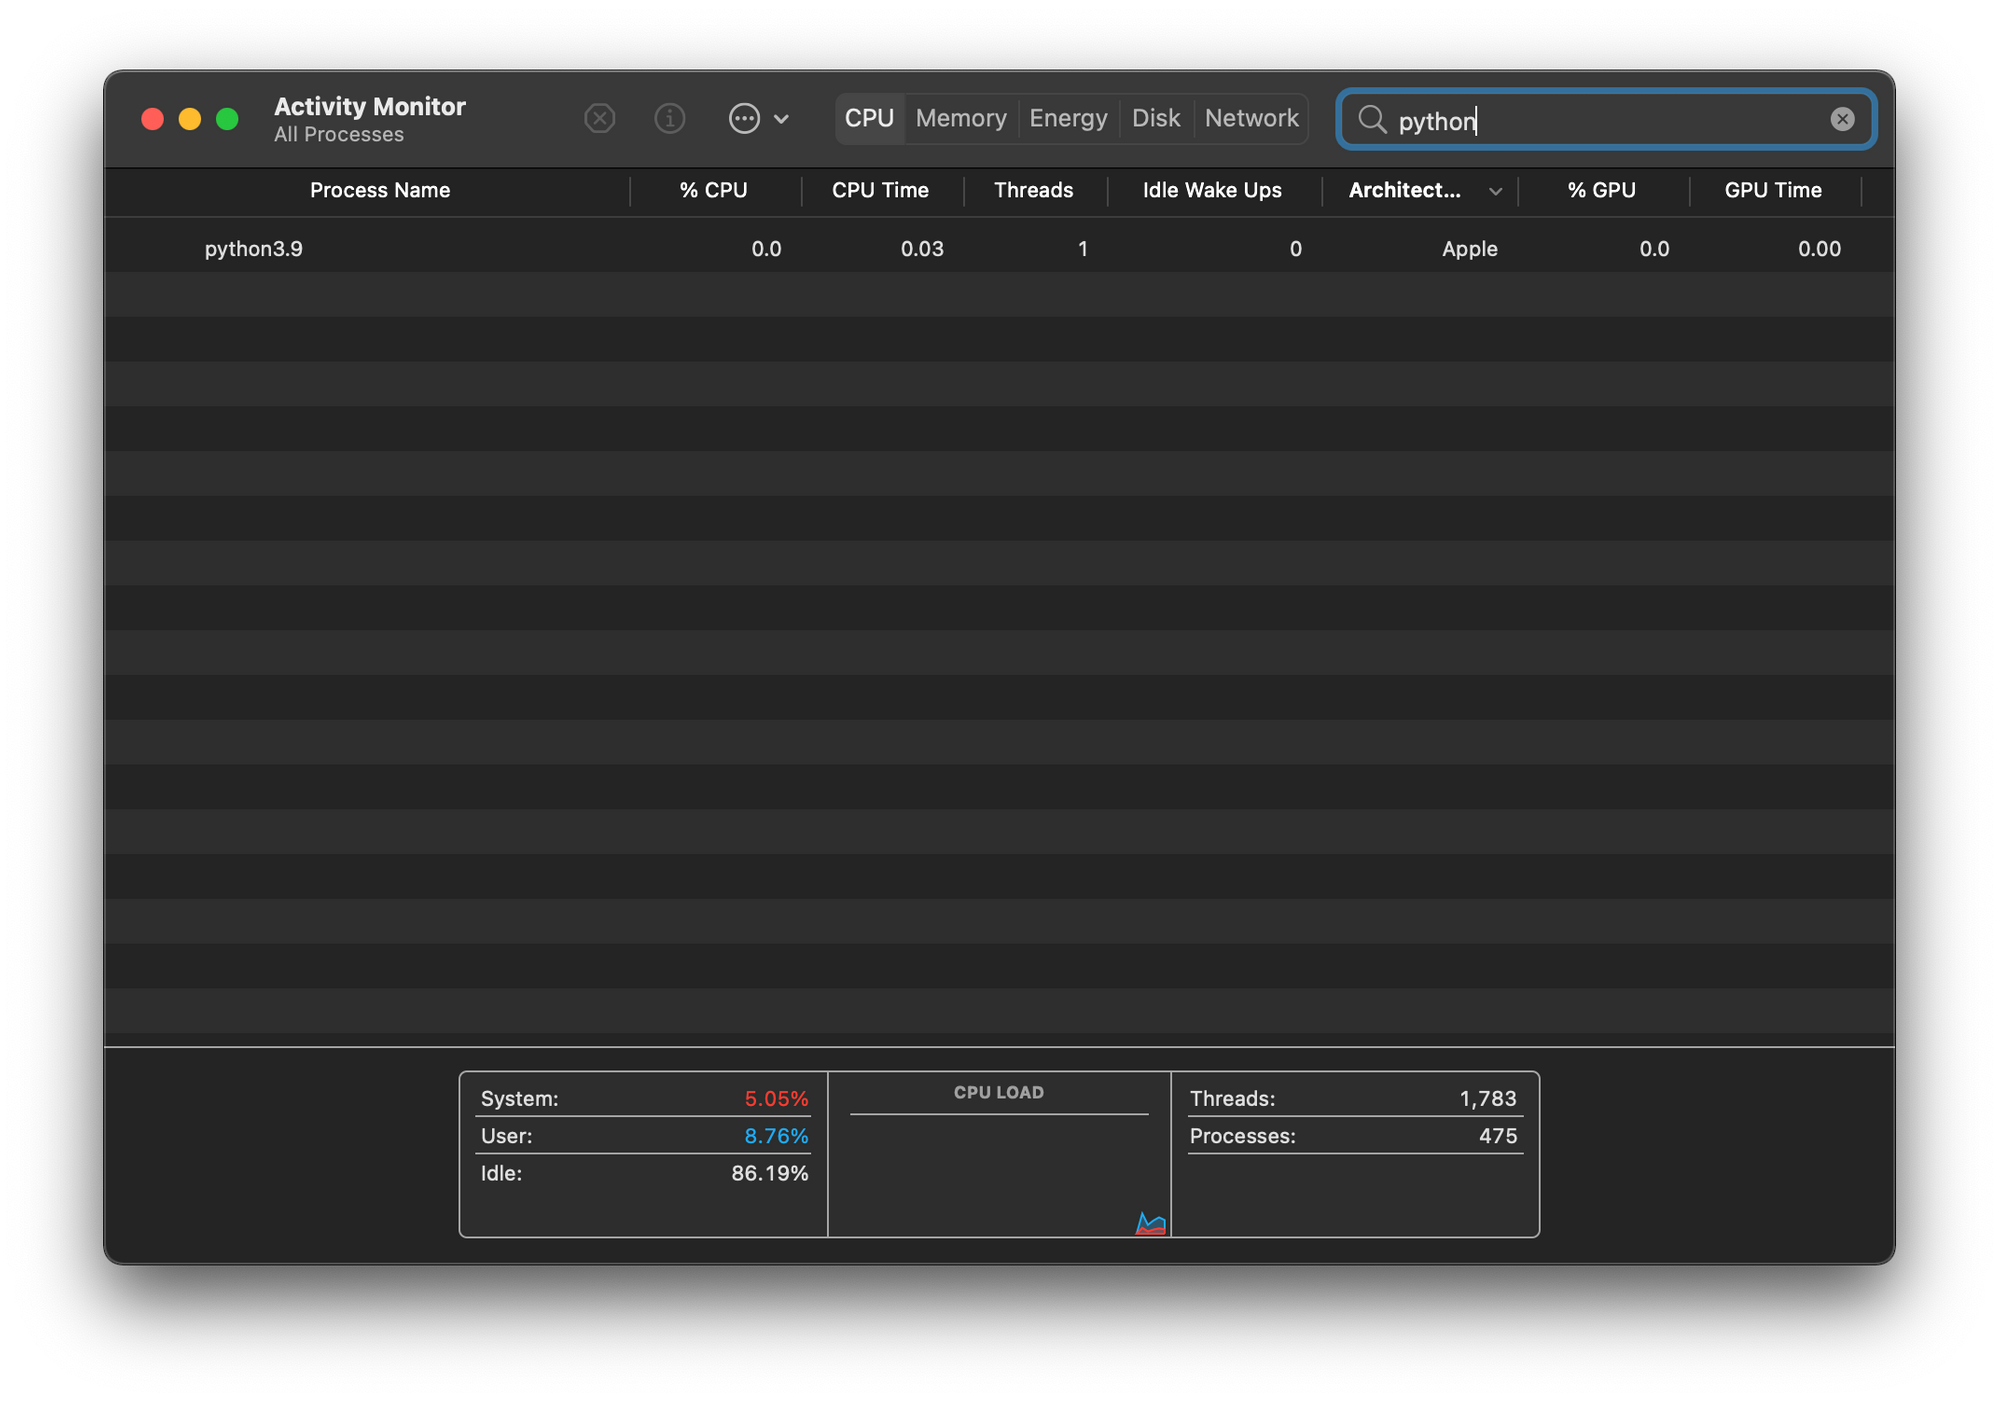
เข้าไปที่ tfm1 Environment ด้วยคำสั่ง conda activate tfm1 แล้วพิมพ์ python ใน Terminal และดู Activity Monitor เพื่อยืนยันว่า Python 3.8 ถูกรันอยู่บน Apple Architecture หรือไม่
conda activate tfm1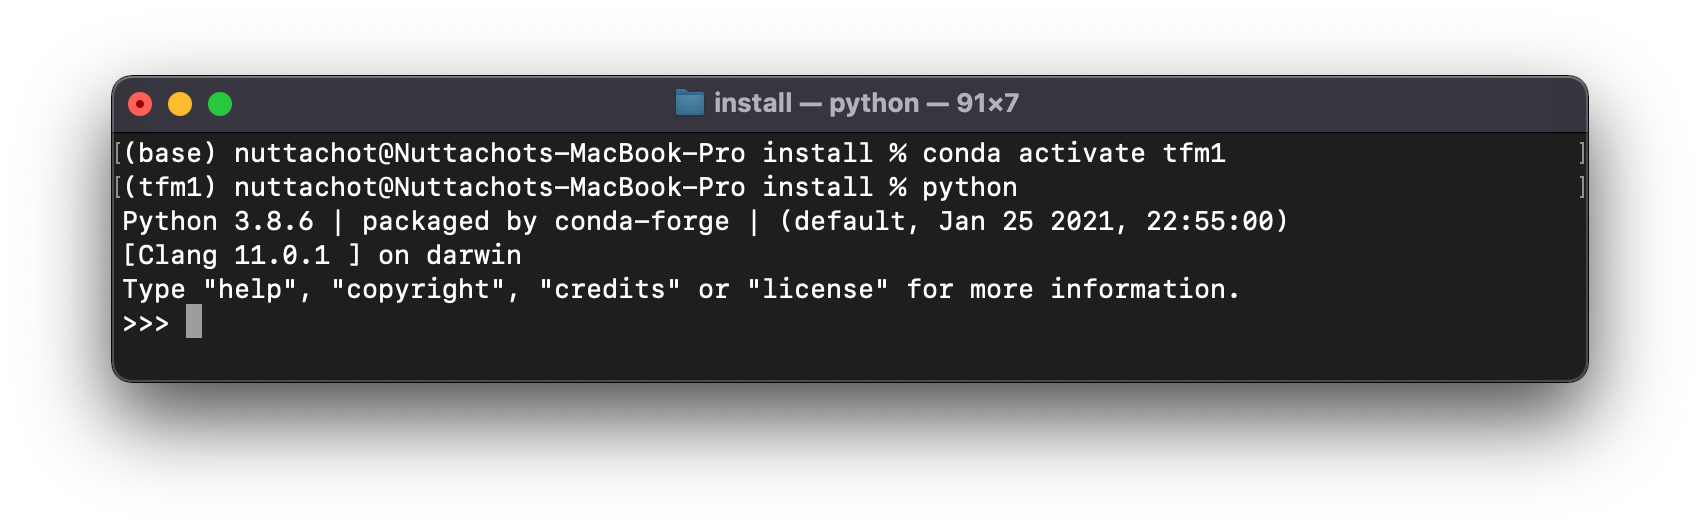

ติดตั้ง TensowFlow 2.4 ด้วยคำสั่ง pip install
pip install --upgrade --force --no-dependencies https://github.com/apple/tensorflow_macos/releases/download/v0.1alpha2/tensorflow_addons_macos-0.1a2-cp38-cp38-macosx_11_0_arm64.whl https://github.com/apple/tensorflow_macos/releases/download/v0.1alpha2/tensorflow_macos-0.1a2-cp38-cp38-macosx_11_0_arm64.whlSpeed Test

MacBook Pro M1 RAM 16GB
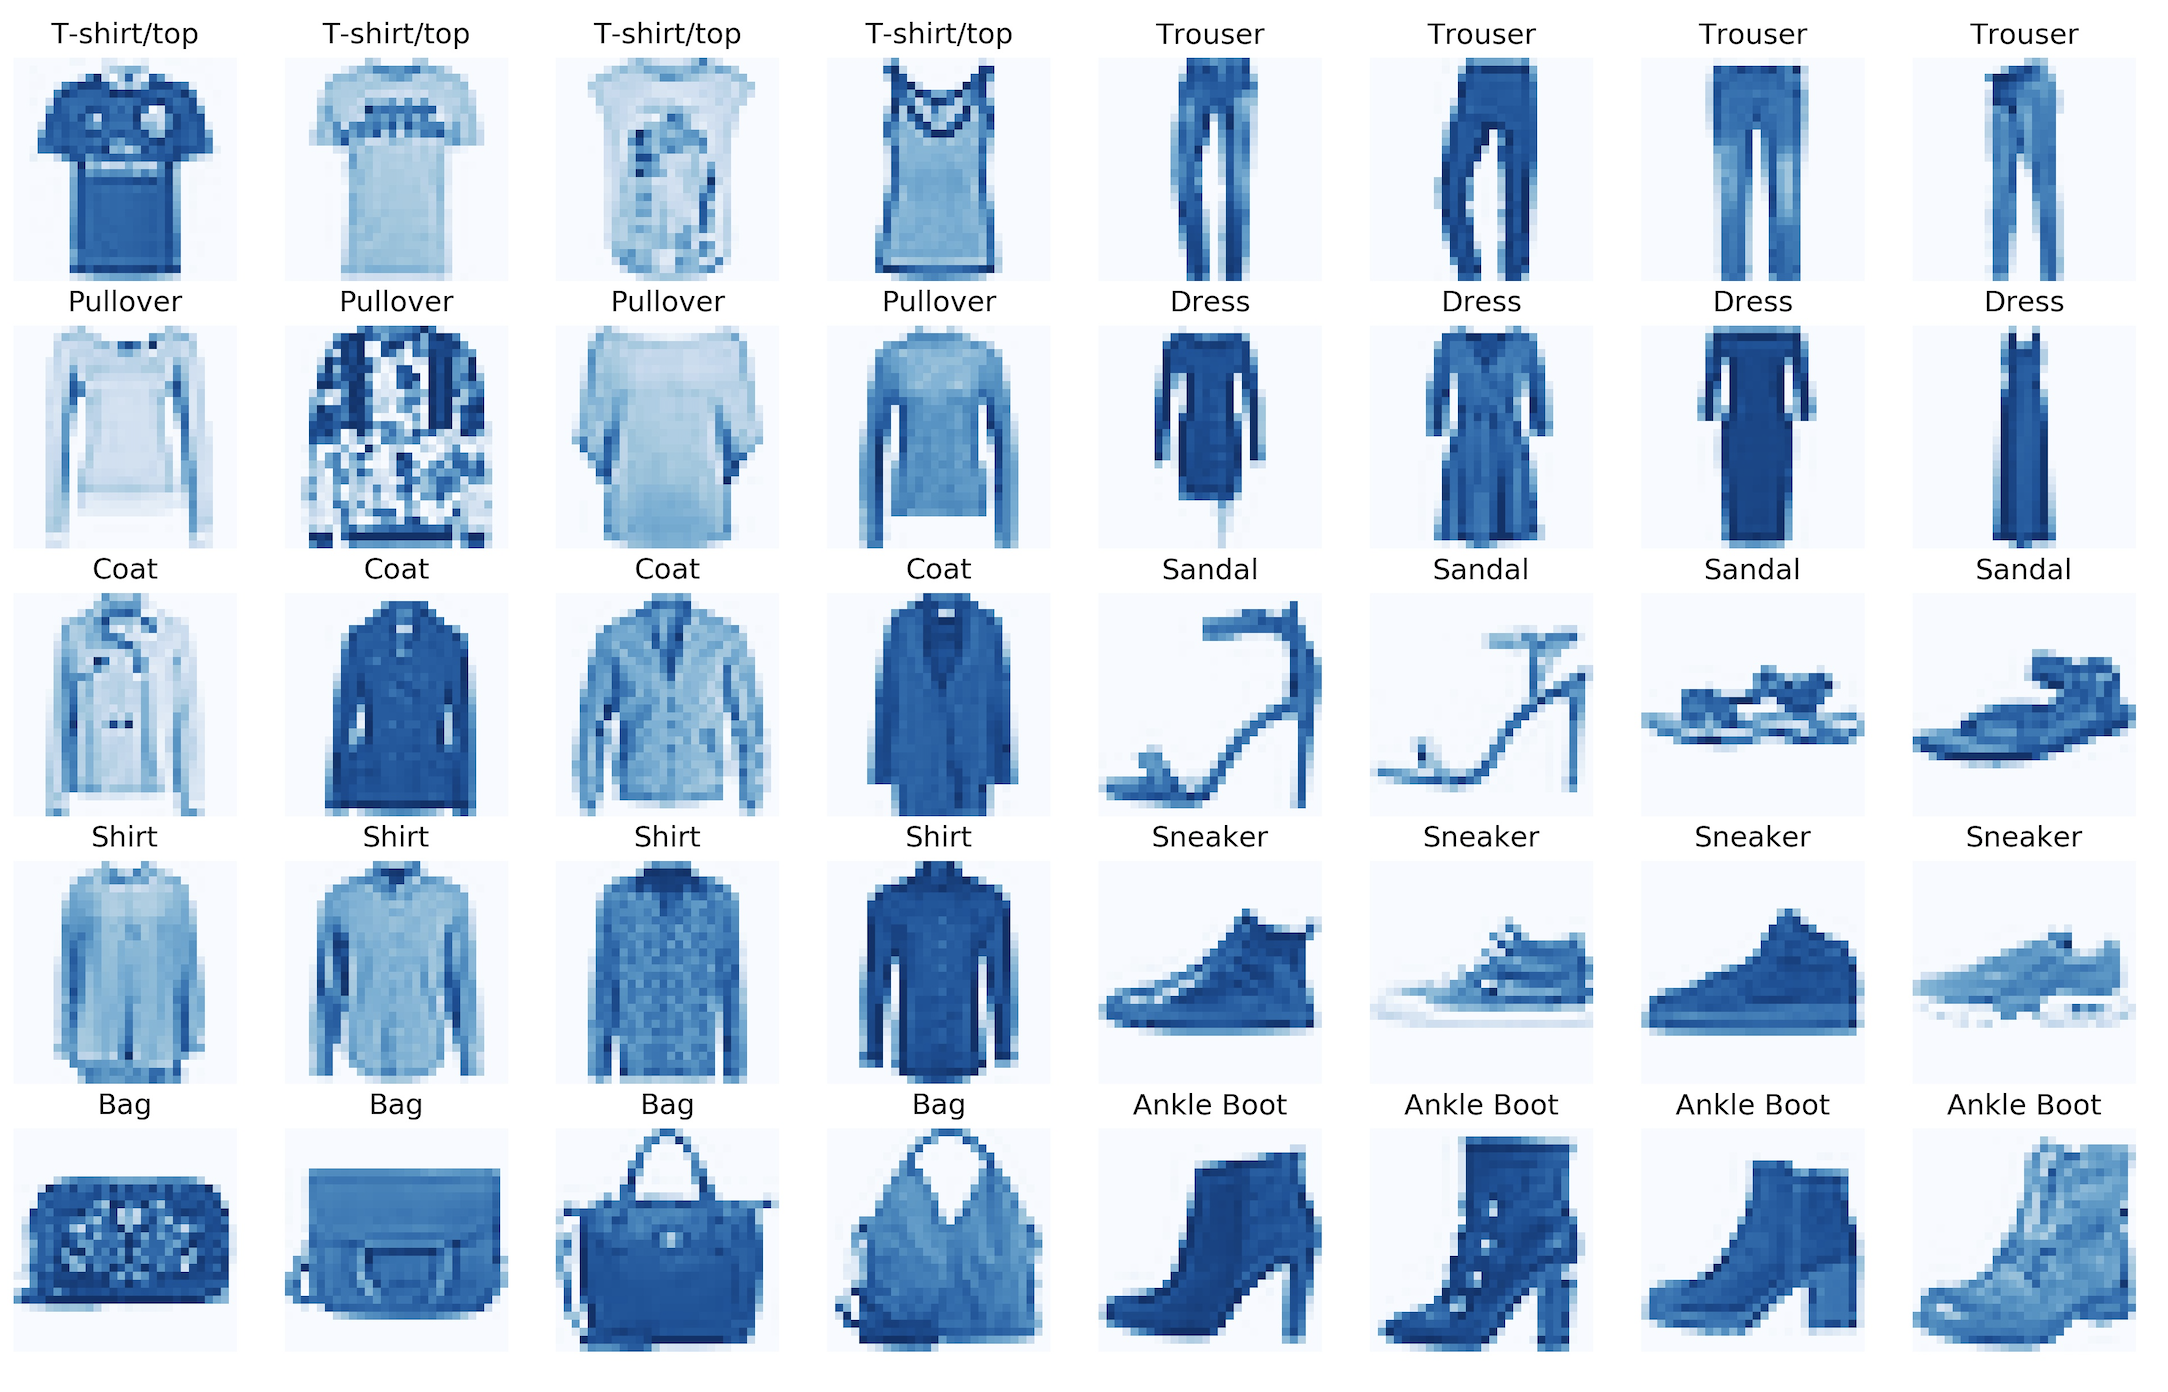
แก้ไข Code โดยใช้ Jupyter Lab ซึ่งเราจะ Train Model เพื่อ Classify ภาพจาก Fashion Mnist Dataset ที่มีทั้งหมด 10 Class ตามขั้นตอน ดังต่อไปนี้
- เปิด Jupyter Lab
jupyter lab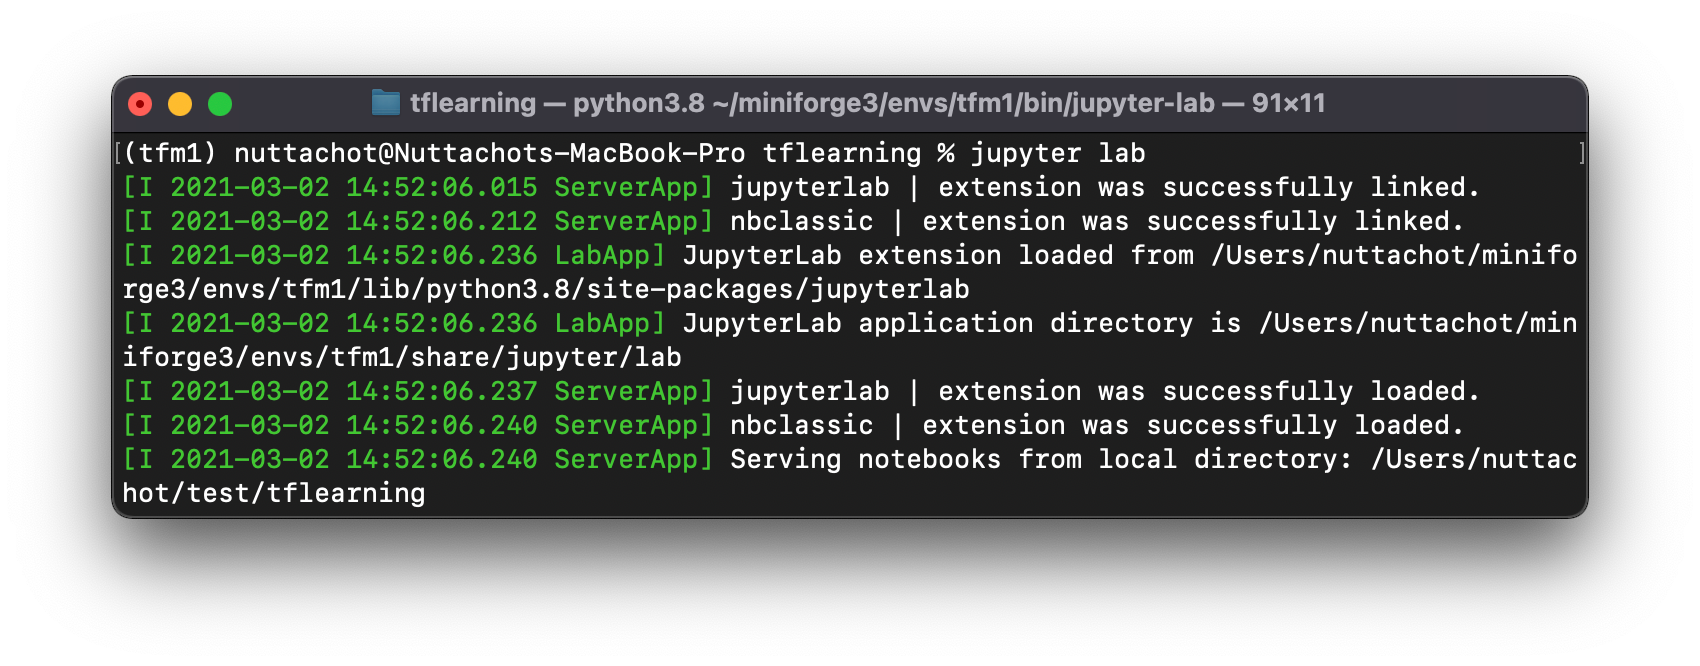
- Import Library ที่ต้องใช้
import tensorflow as tf
from tensorflow.python.compiler.mlcompute import mlcompute
from tensorflow.python.framework.ops import disable_eager_execution

import tensorflow.compat.v2 as tf
tf.enable_v2_behavior()

to_categorical = tf.keras.utils.to_categorical
fashion_mnist = tf.keras.datasets.fashion_mnist

import time- ตรวจสอบ TensorFlow Version
tf.__version__
- ตรวจสอบการทำงานของ TensorFlow กับ Apple ML Compute
mlcompute.is_apple_mlc_enabled()mlcompute.is_tf_compiled_with_apple_mlc()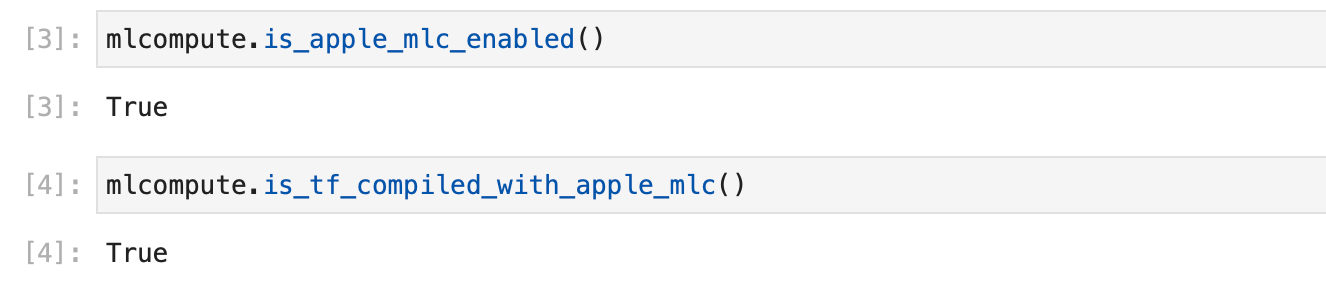
- Disable TensorFlow ในโหมด Eager Execution ที่ทำให้รันทีละคำสั่งได้เหมือนการรันโปรแกรมปกติ และ Config ให้ Train Model บน M1 GPU
disable_eager_execution()
mlcompute.set_mlc_device(device_name='gpu')
tf.executing_eagerly()
- กำหนด Parameter ต่างๆ
batch_size = 128
num_classes = 10
epochs = 10

img_rows, img_cols = 28, 28- Load Fashion Mnist Dataset
(x_train, y_train), (x_test, y_test) = fashion_mnist.load_data()
x_train.shape, x_test.shape
- ทำ Normalization กับ Input Data และเข้ารหัสผลเฉลยแบบ One-hot Encoding
x_train = x_train.reshape(x_train.shape[0], img_rows, img_cols, 1)
x_test = x_test.reshape(x_test.shape[0], img_rows, img_cols, 1)
input_shape = (img_rows, img_cols, 1)

x_train = x_train.astype('float32')
x_test = x_test.astype('float32')
x_train /= 255
x_test /= 255
print('x_train shape:', x_train.shape)
print(x_train.shape[0], 'train samples')
print(x_test.shape[0], 'test samples')

y_train = to_categorical(y_train, num_classes)
y_test = to_categorical(y_test, num_classes)
- นิยาม Model
model = tf.keras.Sequential([
    tf.keras.layers.Conv2D(32, kernel_size=(3, 3), activation="relu", input_shape=input_shape),
    tf.keras.layers.Conv2D(64, kernel_size=(3, 3), activation="relu"),
    tf.keras.layers.MaxPooling2D(),
    tf.keras.layers.Dropout(0.25),
    tf.keras.layers.Flatten(),
    tf.keras.layers.Dense(128, activation='relu'),
    tf.keras.layers.Dropout(0.5),
    tf.keras.layers.Dense(num_classes, activation="softmax")
])- Compile Model
model.compile(loss="categorical_crossentropy", optimizer=tf.keras.optimizers.Adam(), metrics=["accuracy"])
model.summary()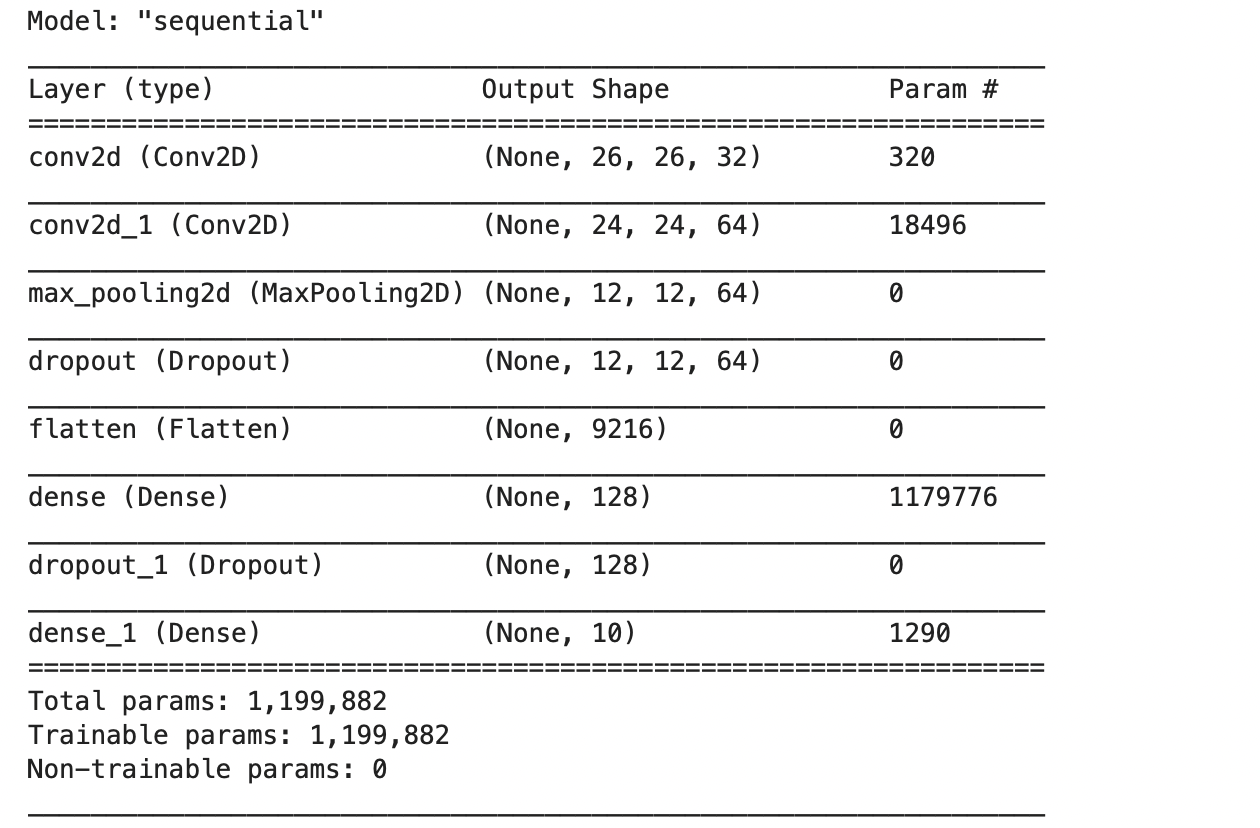
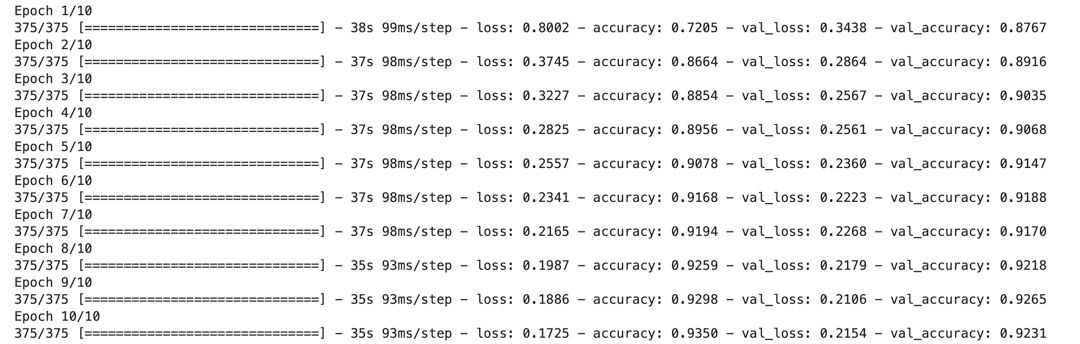
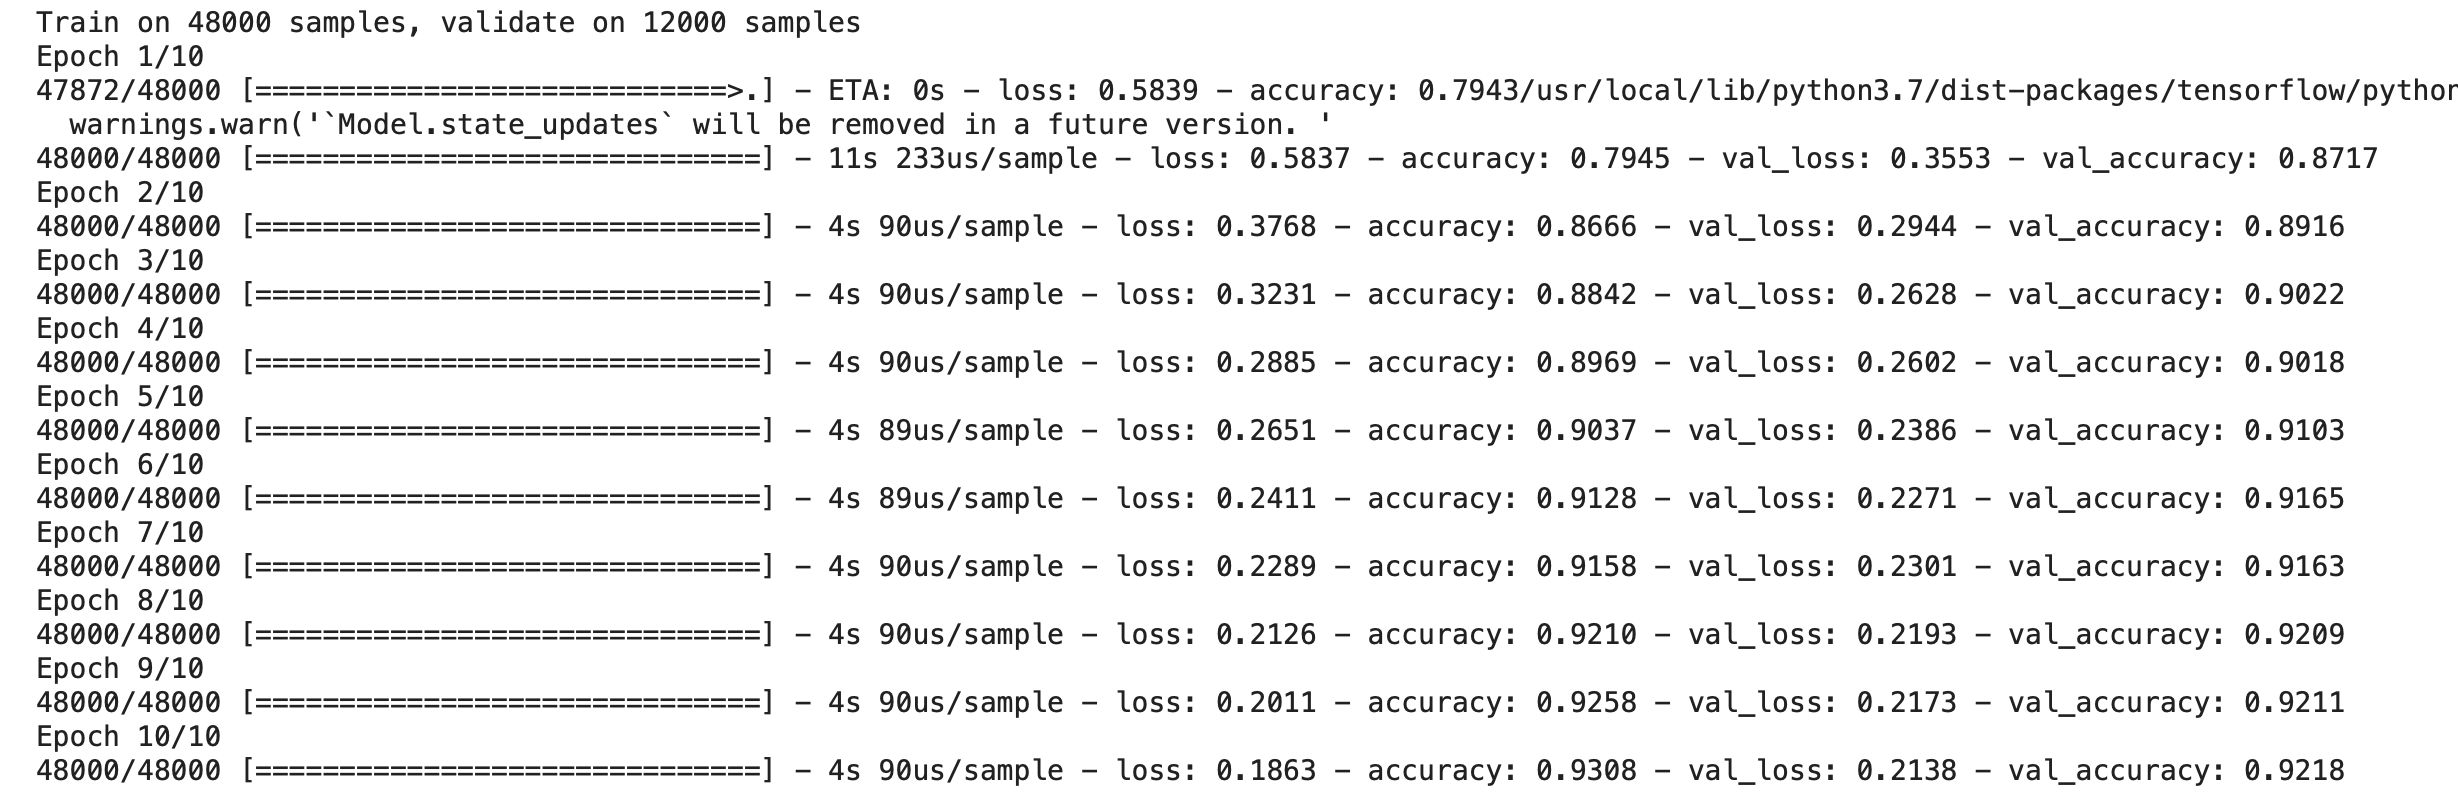
- จับเวลาการ Train Model ทั้งหมด 10 Epoch
start = time.time()
model.fit(x_train, y_train, batch_size=batch_size, epochs=epochs, verbose=1, validation_split=0.2, shuffle= True)
done = time.time()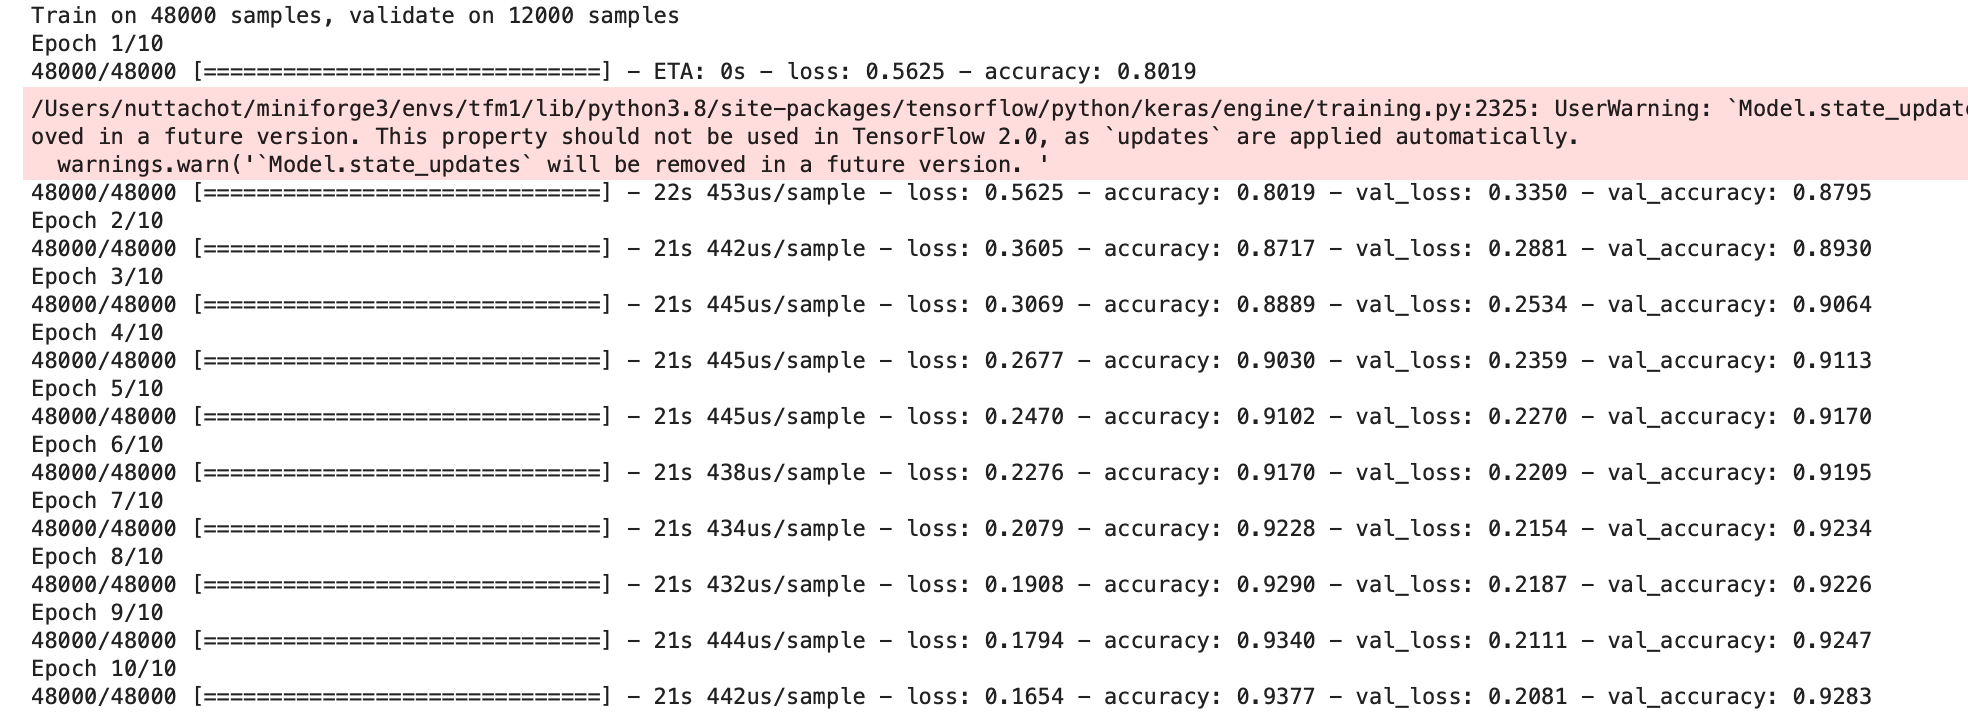
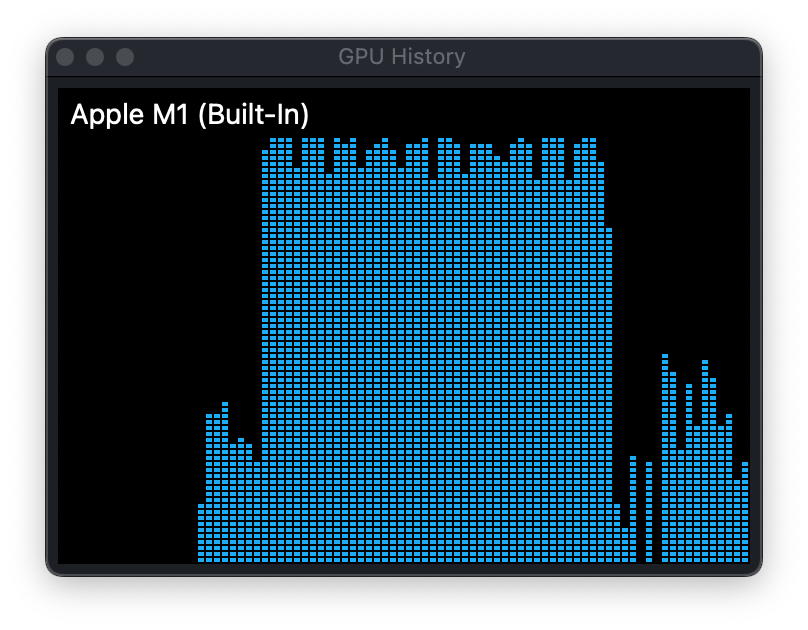
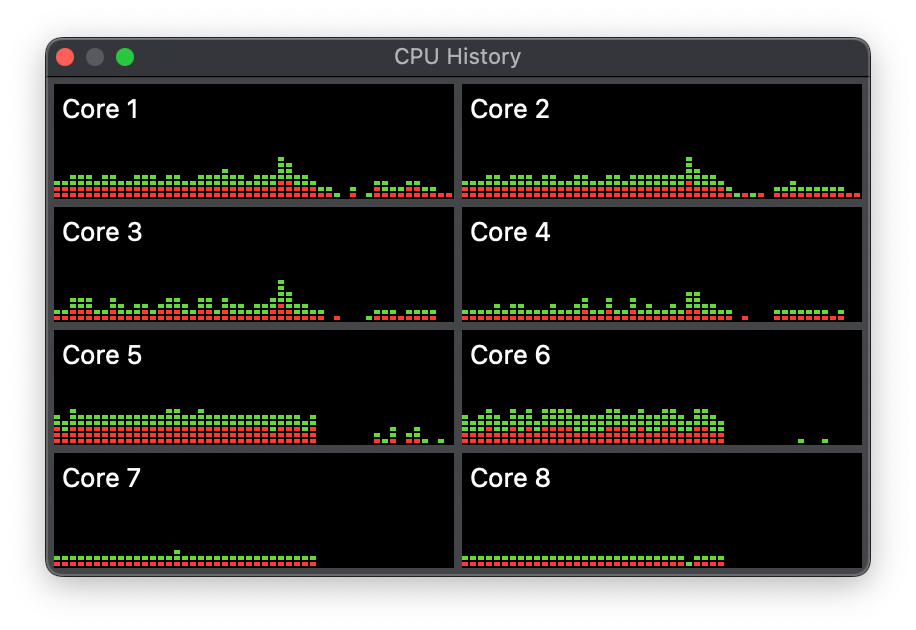
จากภาพด้านบนจะเห็นการใช้งาน M1 GPU ในระหว่างการ Train Model
- Evaluate
test_loss, test_acc = model.evaluate(x_test,  y_test, verbose=2)
print(test_loss, test_acc)
- แสดงเวลาในการ Train Model ทั้งหมด 10 Epoch
total_time = done - start
print(f'Training and testing took {total_time:.2f} seconds')
MacBook Pro 15-inch Intel Core i7 (2018) RAM 16GB
Train Model สำหรับ Classify Fashion Mnist Dataset บน MacBook Pro Intel CPU โดยใช้ TensorFlow 2.4 Version ปกติ บน Environment เดียวกันกับ M1 (environment.yml)
- จับเวลาการ Train Model ทั้งหมด 10 Epoch
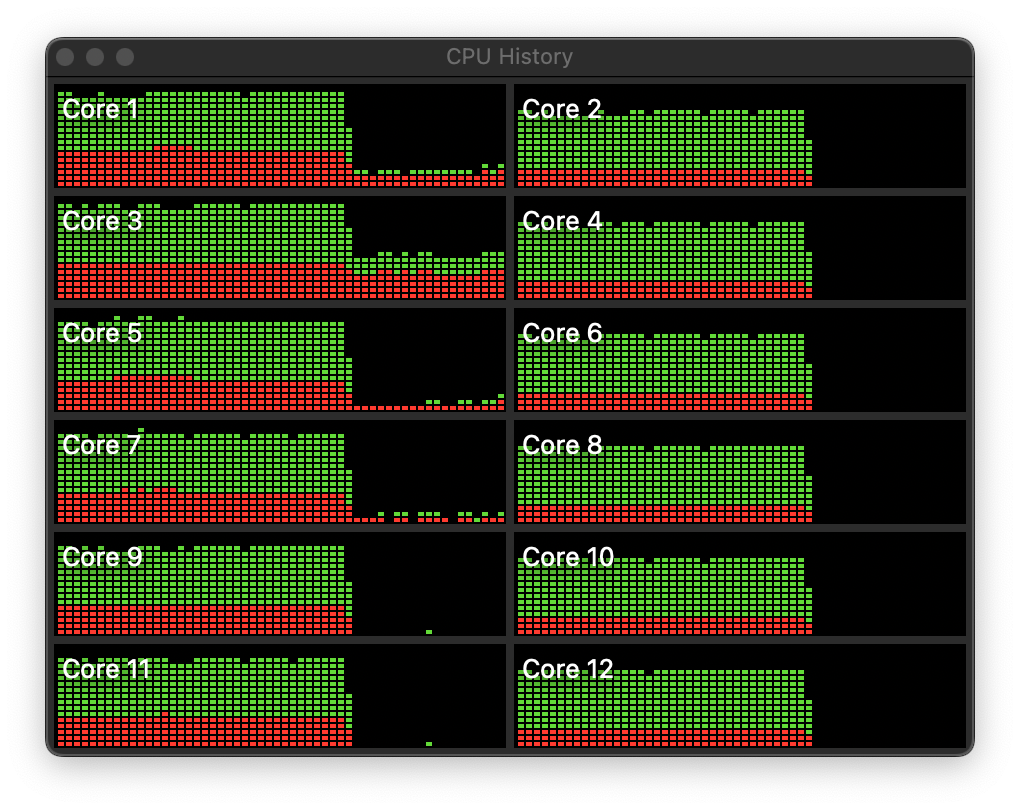
จากภาพด้านบนจะเห็นการใช้งาน Intel CPU ในระหว่างการ Train Model
- Evaluate

- แสดงเวลาในการ Train Model ทั้งหมด 10 Epoch

Tesla T4 GPU
Train Model สำหรับ Classify Fashion Mnist Dataset บน Google Colab ด้วย Tesla T4 GPU

- Evaluate

- แสดงเวลาในการ Train Model ทั้งหมด 10 Epoch

Result
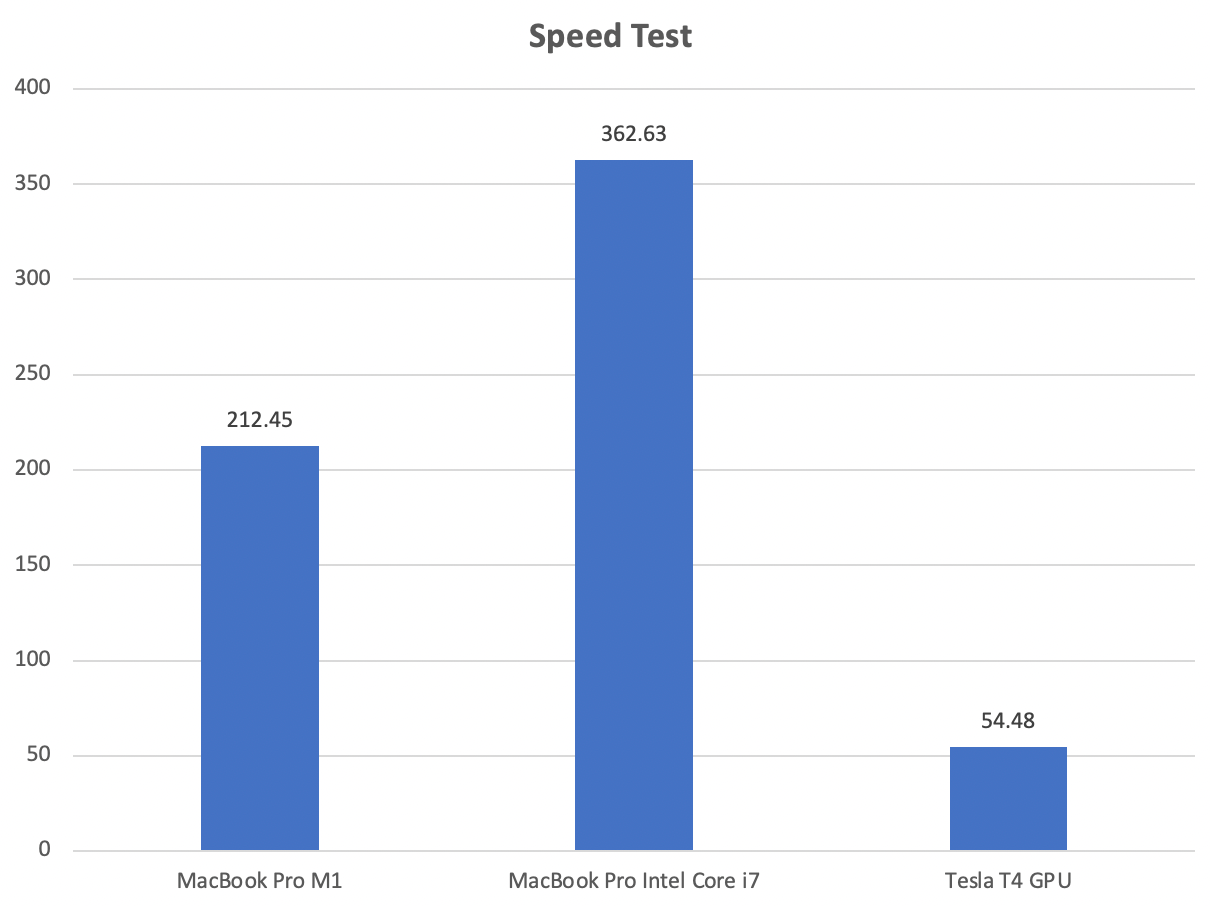
จะเห็นว่า Tesla T4 ใช้เวลาในการ Train Model น้อยที่สุด ส่วน MacBook Pro M1 ทำเวลาได้ดีในระดับหนึ่งครับ